

Here in Arizona, your screen enclosure is the one thing standing between a perfect evening on the patio and a constant battle with mosquitos and other pests. But between the intense desert sun and the force of our monsoon storms, these enclosures take a beating. That’s why knowing a thing or two about screen enclosure repair is a critical skill for any Scottsdale or Phoenix homeowner.
After years of working on these structures, I’ve seen it all. This guide is built on that real-world experience to help you keep your outdoor living space in top shape.
Why A Healthy Screen Enclosure Matters in Arizona
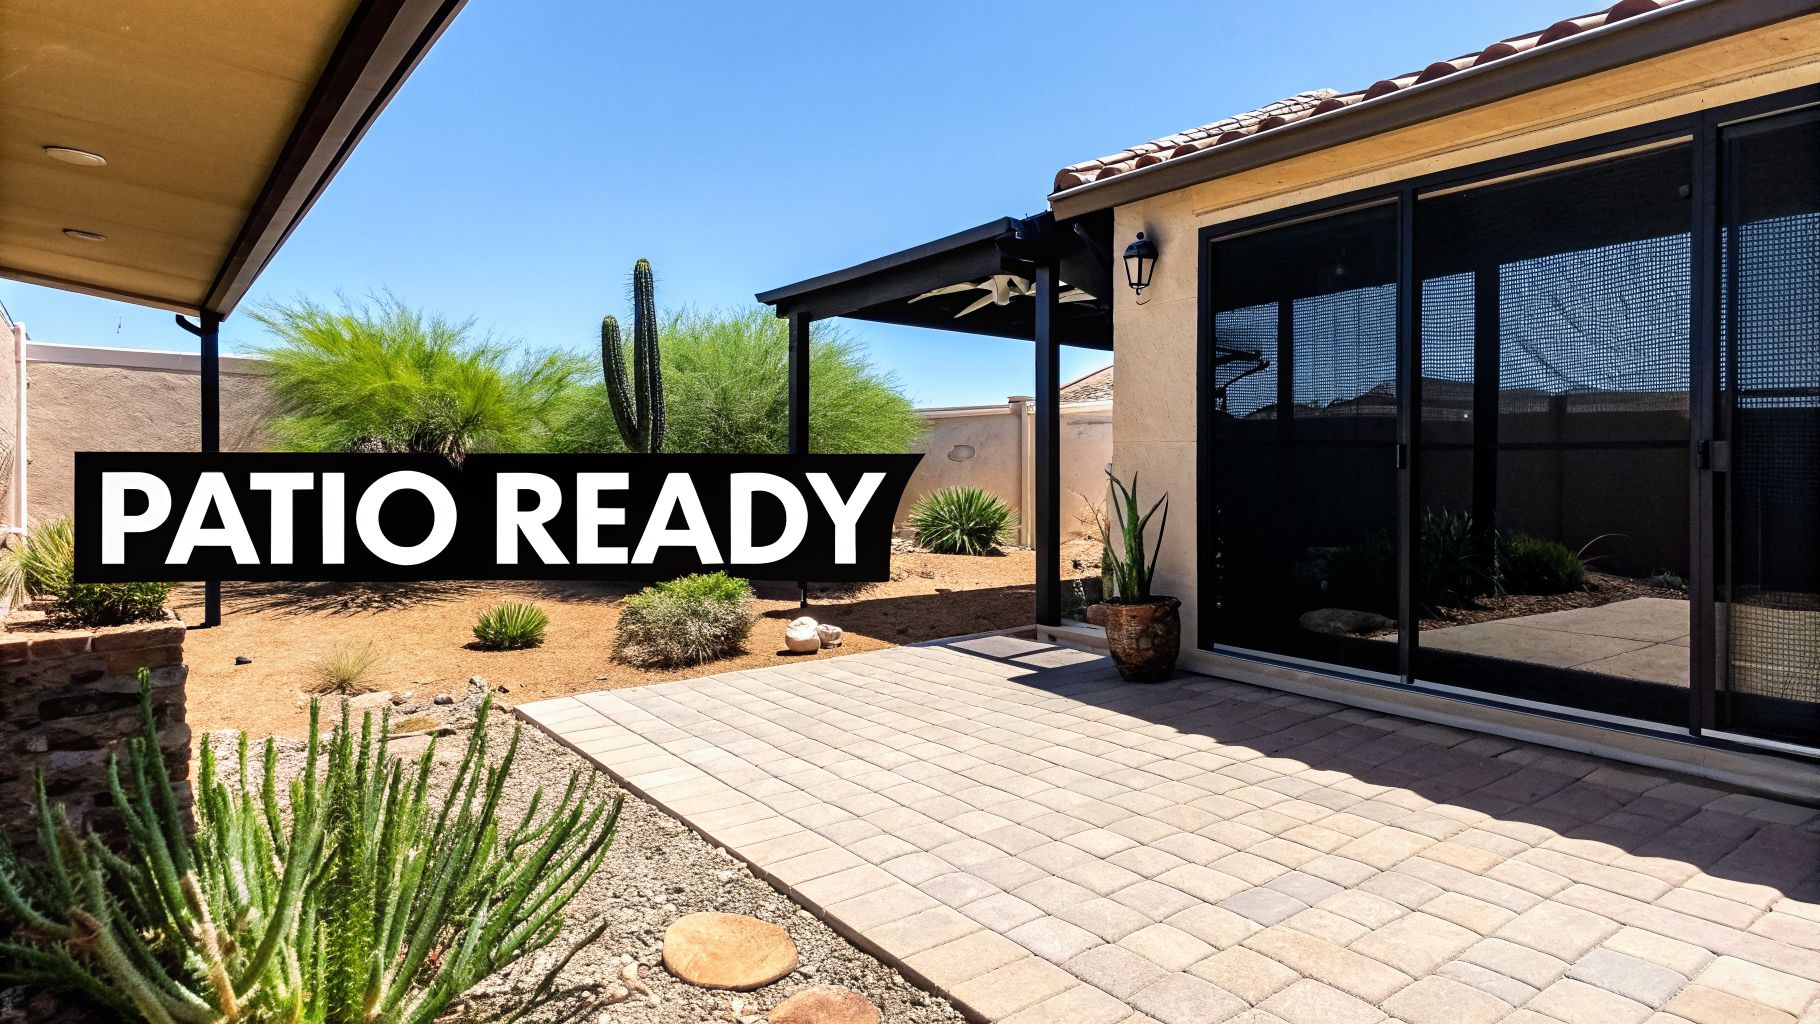
A solid, well-kept screen enclosure does more than just keep bugs out; it makes your patio a genuinely livable extension of your home. It’s a feature that boosts your property value and your quality of life. But here in the Valley, they’re under constant assault.
The relentless UV rays bake the screen mesh, making it brittle and prone to tearing. Then a monsoon storm rolls through, and those powerful winds can rip a weakened panel right out or even bend the aluminum frame. I see it all the time—homeowners who ignore a small tear, only to have it turn into a major, expensive failure after one bad storm.
It's no surprise that homeowners are investing heavily in these spaces. The global market for screen enclosures was valued at an impressive $7.83 billion in 2025, driven by people wanting to maximize their outdoor areas, especially in sunny places like Phoenix. The data backs it up: keeping up with small repairs can extend the life of your enclosure by up to 50%. That’s a huge deal when you consider a full replacement can easily run over $10,000.
A Proactive Approach Saves Time and Money
Waiting for a total blowout is the most expensive way to maintain your enclosure. A little bit of attention now and then goes a long way and saves a ton of frustration down the road. My goal here is to give you the confidence to look at your enclosure, figure out what’s wrong, and know whether to tackle it yourself or call in a pro.
We're going to cover the essentials, all tailored specifically for our unique climate:
- How to spot damage that isn’t just an obvious hole.
- The specific tools and materials you'll need for a solid DIY fix.
- A clear guide on when to DIY and when it’s smarter to hire a professional.
A torn screen isn’t just ugly; it’s a welcome mat for pests and the start of even bigger problems. Fixing issues as soon as you see them is the best way to protect your investment and keep your patio ready to enjoy.
Understanding how to care for your enclosure is a key piece of overall home maintenance. By learning to spot and fix problems early, you ensure your patio remains a beautiful, functional retreat for years. It's a fundamental part of the bigger picture, which we detail further in our exterior home maintenance checklist.
How to Properly Assess Screen Enclosure Damage
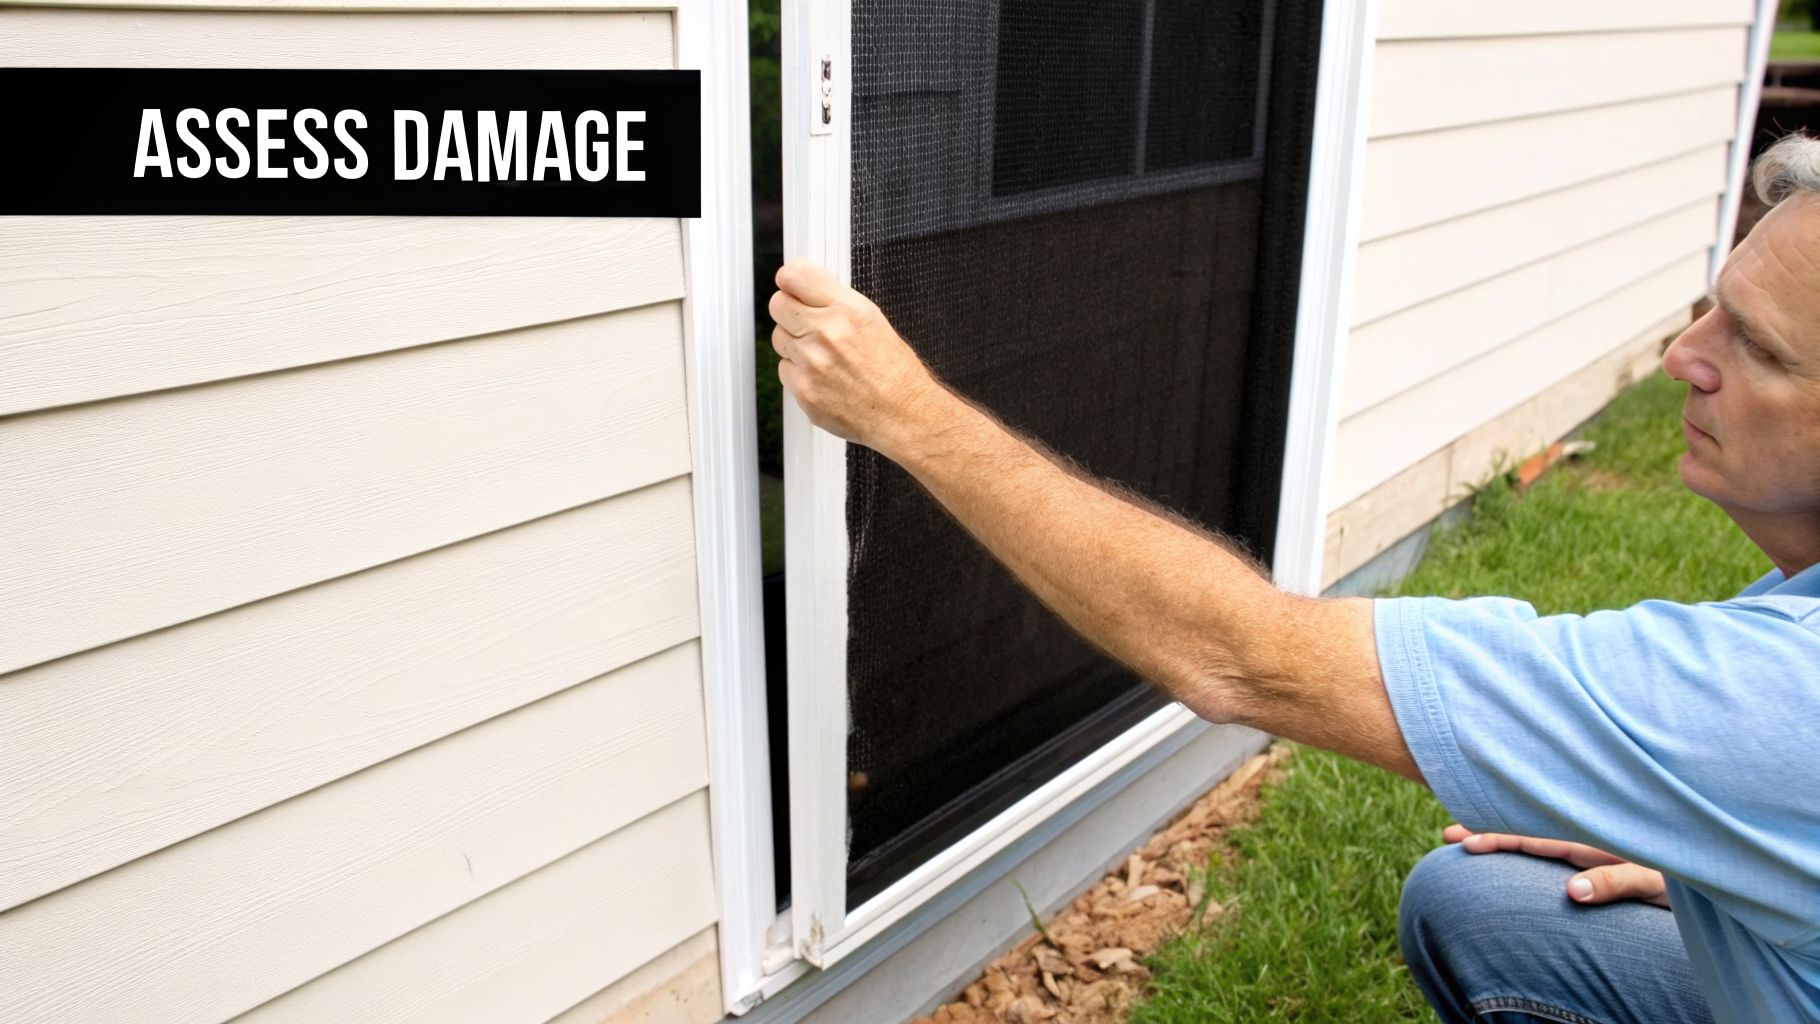
Before you even think about grabbing your tools, the most important thing you can do is give your screen enclosure a thorough, honest inspection. Spotting a big, obvious tear is easy, but that’s just scratching the surface. A real assessment, the kind we do on every job, goes much deeper to find the problems that are hiding in plain sight.
This is what makes the difference between a screen enclosure repair that lasts for years and a quick patch that fails the minute the next monsoon rolls in. You have to play detective for a few minutes to understand the full story of what’s gone wrong—and what’s about to.
Look Beyond the Obvious Tears
Start by walking the entire enclosure, both inside and out. Don't just glance at it from your patio door; get up close and really look. The biggest mistake homeowners make is fixing the one rip they can see while ignoring the less obvious signs of widespread wear.
Here’s what to look for on the screen mesh itself:
- Fading and Brittleness: Does the screen look washed-out, grey, and chalky instead of a deep, uniform black? That’s a tell-tale sign of UV damage from our intense Arizona sun.
- Tiny Punctures: Scan for small holes from bugs, lizards, or even recent hail. They might seem harmless, but each one is a weak point just waiting to become a major tear.
- Sagging or Waviness: A healthy screen panel should be perfectly taut. If it looks wavy or droops in the middle, the screen has lost its tension or the spline holding it in has failed.
Here’s a quick pro tip: Gently push on a section of the screen with your finger. If it feels brittle and makes a crackling sound, you’re dealing with sun rot. A good screen will feel strong but flexible.
A sun-rotted screen is a ticking time bomb. It might not be torn yet, but a single strong gust of wind can shred it instantly, turning a one-panel fix into a whole-enclosure headache.
Inspect the Spline and Fasteners
The screen mesh gets all the attention, but the hardware holding your enclosure together is the unsung hero. That rubber cord tucked into the frame’s channel is called the spline, and it’s what holds the screen tight. Over years of heat exposure, it dries out, shrinks, and pops right out of the groove.
Take a walk around and run your finger along the spline channels on each panel. If you find sections where it’s missing or sticking out, that panel is no longer secure. Even with a perfect screen, a loose spline means it’s only a matter of time before the whole panel blows out.
While you're at it, check the screws and bolts holding the aluminum frame together. Look especially closely at the base where the frame meets your concrete patio and where the roof panels connect. Rusty fasteners are a serious red flag. Not only do they leave ugly rust stains on your frame, but they represent a critical structural weakness. Any fastener showing corrosion needs to be replaced, period.
Your DIY Screen Repair Toolkit and Materials
Trying to fix a screen enclosure without the right gear is a recipe for frustration. I've seen it a hundred times—it’s like trying to paint a wall with a toothbrush. You’ll eventually make a mark, but the result will be messy, and you’ll wish you’d just gotten the right roller from the start.
Having the correct tools and materials ready to go is what separates a clean, professional-looking repair from a saggy, amateur-looking patch. It’s not just about saving time; it's about doing the job right so you don’t have to do it again in a few months. Let's walk through exactly what you need to get this project done with confidence.
The Essential Tools for Screen Repair
You don't need a professional-grade workshop to handle most screen repairs. In fact, the list is surprisingly short. But the key is getting the right tools for the job, not just "close enough" substitutes. Trying to use a screwdriver or a pizza cutter to install the spline will only end in tears and a torn screen.
Here’s the short list of must-haves:
- A Quality Spline Roller: If you buy one quality tool for this job, make it this one. It has two wheels: a concave one to push the spline into its channel and a convex one to crease the screen beforehand. Do not buy the cheapest plastic one. Spend a few extra dollars on a model with metal wheels and ball bearings. Trust me, it will make the job at least 50% easier.
- A Sharp Utility Knife: You need a fresh, razor-sharp blade. A dull knife will snag and pull the screen mesh, potentially ruining your brand-new panel right at the final step. Always start with a new blade.
- A Small Flathead Screwdriver or Awl: This is purely for digging the old, brittle spline out of the frame’s channel. Something small and thin works best to get into that tight groove.
- A Tape Measure: The old saying "measure twice, cut once" has never been more true. Accuracy is everything.
- Spring Clamps: A few small clamps are your best friend for this project. They hold the screen taut and square on the frame while you work, which is the secret to avoiding sags and wrinkles.
I can't stress this enough: never try to force the new spline into place with a screwdriver. You will almost certainly puncture your new screen. The spline roller is specifically designed to apply firm, even pressure without causing any damage.
Choosing The Right Screen Material For Your Repair
When you get to the hardware store, the wall of screen options can feel a bit much. Here in the Scottsdale and Phoenix area, your choice isn't just about keeping the bugs out—it’s about finding a material that can stand up to our intense sun and heat.
Think about where the damaged panel is located. A panel that gets blasted by the western sun all afternoon has very different needs than one on a shaded patio. The right material makes all the difference in how long your repair will last.
This table breaks down the most common choices to help you find the perfect fit.
Choosing The Right Screen Material For Your Repair
| Screen Material | Best For | Pros | Cons | Average Cost (Per Sq. Ft.) |
|---|---|---|---|---|
| Fiberglass | General use, budget-friendly repairs | Inexpensive, flexible, easy to install | Prone to tearing, shorter lifespan in direct sun | $0.20 – $0.40 |
| Pet-Resistant | Homes with dogs, cats, or children | 7x stronger than fiberglass, resists tears and punctures | Thicker, can slightly reduce visibility, more expensive | $0.60 – $0.90 |
| Solar Screen | West/South-facing panels, energy savings | Blocks 65-90% of solar heat and UV rays, reduces cooling costs | Darker appearance, highest upfront cost | $1.00 – $1.50+ |
After looking at the options, you can see how the right choice depends entirely on your situation. For a quick fix on a budget, standard fiberglass is fine. But if your dog loves to scratch at the door or you want to lower your summer cooling bills, investing in a specialty screen is well worth it.
Don't Forget the Spline
The last piece of the puzzle is the spline. This is the rubber cord that acts like a wedge, locking the screen mesh tightly into the frame's channel. It's not a one-size-fits-all item, and grabbing the wrong size is a surefire way to have your new screen pop right out.
Spline comes in many different diameters. The absolute best way to get the right size is to take a small piece of the old spline with you to the store and match it up visually. If the old spline is too degraded to compare, it's generally safer to buy a size that looks slightly larger rather than smaller. A spline that's too small won't create enough tension, and your screen will sag. Getting this small detail right is crucial for a lasting repair.
A Practical Guide to Common Screen Repairs
Alright, you've got your tools and materials ready. Now for the fun part—tackling the actual repair. This is where your prep work really pays off. Whether you're fixing a tiny, annoying hole or replacing a whole panel that's seen better days, the job is very doable with a bit of patience.
Don't let the idea of swapping out an entire screen panel scare you off. It’s a project I’ve seen countless homeowners handle successfully. I'll even share a few tricks of the trade I've picked up over the years to help you get that tight, clean finish that makes a repair look like it was done by a pro. Let's get started.
This simple flowchart breaks down the initial prep into three key actions. Getting this part right is half the battle for a smooth repair job.
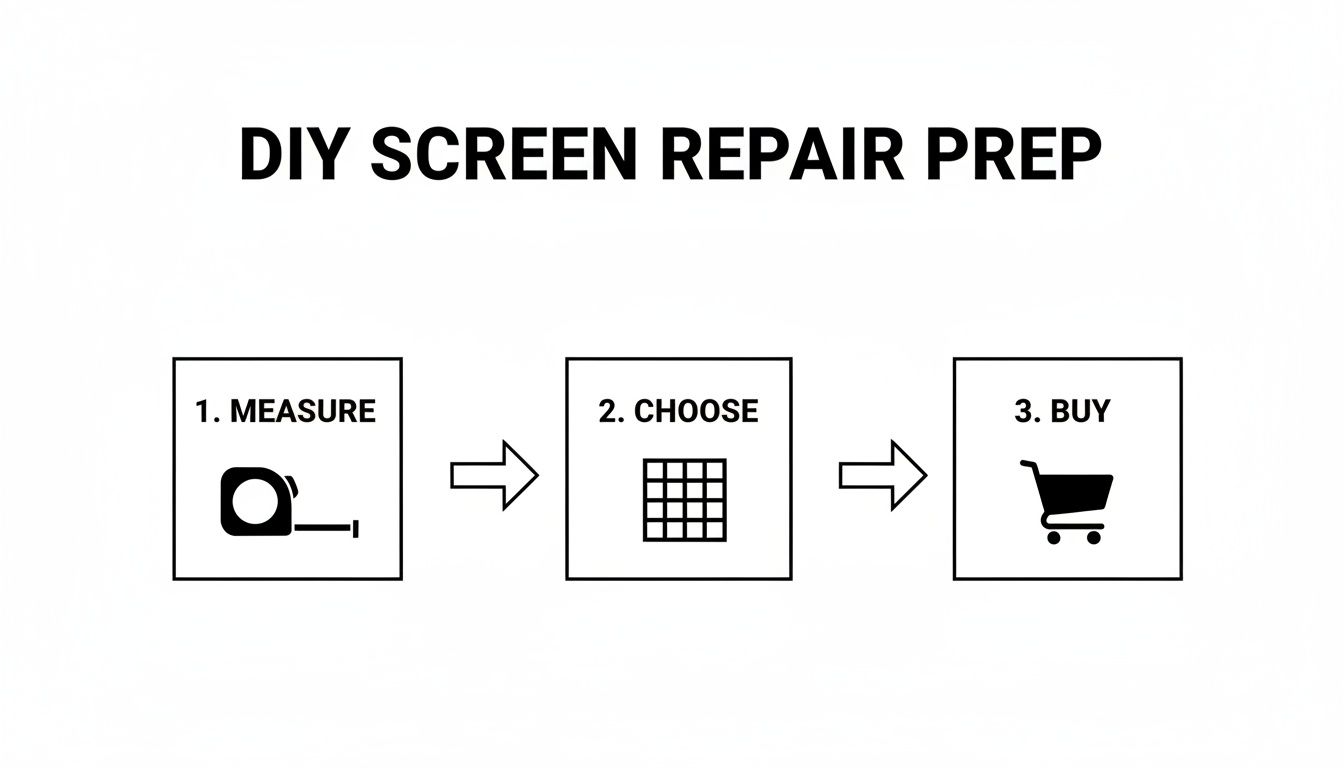
It really just boils down to measuring accurately, picking the right screen for your needs, and buying everything you need in one trip.
Handling Small Tears and Punctures
If you’re just dealing with a hole smaller than a couple of inches, you can breathe a sigh of relief. You probably don't need to replace the entire screen. A simple screen patch kit from the hardware store can work wonders and is almost invisible once it's on.
First, you need to clean the area around the tear. Just wipe it down with a cloth and a little rubbing alcohol. This gets rid of that fine layer of Phoenix dust and helps the patch adhesive stick properly. Once it's dry, just peel the backing off and press the patch firmly over the hole. I like to apply pressure from both sides for about 30 seconds to make sure it's secure.
A quick patch is a great short-term fix, but keep in mind it's often a temporary band-aid. If you see several tears on the same panel or if the screen itself feels brittle when you touch it, that’s a clear sign the sun has taken its toll. Patching one hole today might just mean you’re fixing another one next month.
Replacing a Full Screen Panel
When a tear is just too big to patch, or the screen is obviously sun-rotted and falling apart, a full panel replacement is your best bet. This is by far the most common type of screen enclosure repair, and learning how to do it right will save you a lot of headaches down the road.
Getting the Old Screen Out
Your first move is to remove the old spline—that’s the rubbery cord holding the screen in the frame's channel. Take a small flathead screwdriver or an awl and carefully dig into the groove to pry up one end. Once you get a little piece started, you can usually just grab it and pull the entire thing out in one long strip.
With the spline gone, the old screen will lift right out. Before you do anything else, grab a brush and clean out that empty channel. You want to get rid of any dust, debris, or little bits of old spline that got left behind. A clean channel is key to getting the new screen to sit perfectly.
Setting Up the New Screen
Now, unroll your new screen mesh and lay it over the frame. You’ll want to leave at least a few inches of extra material hanging over all four sides. This is your safety margin, so don't skimp here. Use your spring clamps to hold the screen to the frame at the top, pulling it snug but not stretching it out. This simple step is your best defense against wrinkles later on.
Insider Tips for a Flawless Finish
Here’s a little trick that separates the DIY look from a professional one. Before you even think about putting the new spline in, grab your spline roller. Use the convex wheel (the rounded one) and gently roll it over the screen, pressing the mesh into the channel all the way around. This "pre-creasing" creates a perfect track for the spline to sit in and is the secret to getting that drum-tight, brand-new look.
Installing the New Spline
Pick a corner and get started. Using the concave (grooved) wheel of your roller, press the new spline into the channel right on top of the screen you just creased. Apply firm, steady pressure as you roll down the first side. When you get to a corner, don't cut the spline. Just use your screwdriver to poke it securely into the corner and then continue down the next side.
As you work your way around, you'll feel the screen pull itself tight. You can remove your clamps as you go. For a more detailed look at this part of the job, our guide on how to replace window screen mesh is a great resource since the core technique is very similar.
The Final Trim
Once the spline is fully installed, your screen should be taut and wrinkle-free. All that's left is to trim the excess screen. Take your sharp utility knife and, holding it at a slight angle, place the blade against the outside edge of the spline. Carefully cut away the extra material, using the spline itself as a guide. Go slow here—the last thing you want is to slip and slice the beautiful new screen you just installed.
Knowing When to Call a Professional
There's a real satisfaction in fixing a torn screen panel yourself. It’s a great weekend project. But knowing when to put the tools down and pick up the phone is just as important. This isn't about giving up; it's about being smart and protecting your home, your safety, and your wallet.
Some jobs just aren't meant for a DIY approach. If you're looking at widespread damage—say, tears in several panels at once—you're probably dealing with more than just a single snag. That's often a sign of "sun rot," where the screen material across the entire enclosure has become brittle from years under the Arizona sun. Patching one panel is just a temporary fix when the others are ready to go, too.
Structural Integrity and Safety Concerns
The absolute, non-negotiable time to call for help is when the aluminum frame itself is damaged. I've seen it a hundred times, especially after a big monsoon storm rolls through. If you spot bent, dented, or cracked frame sections, that's a serious structural problem. Trying to bend them back yourself can easily weaken the metal, creating a major safety hazard.
Working at heights is another huge red flag. Any repair that involves a second-story balcony or a high roof panel should be left to the pros, period. We have the right ladders, scaffolding, and safety harnesses to get the job done without risking a fall. It's just not worth the potential savings.
Think of these situations as an immediate call to an expert:
- Damaged Frame: Any aluminum that is bent, cracked, or severely corroded.
- Roof Panel Repairs: Working overhead is tricky and dangerous without specialized gear.
- Second-Story Enclosures: The safety risks are simply too high for a DIY job.
- Widespread Screen Failure: If more than a third of your panels are shot, it’s time for a full rescreening.
The moment a repair involves the structural frame or requires you to get on a tall ladder, it’s no longer a simple screen job. It becomes a safety and construction project, and that’s where professional expertise is a must.
The Professional Advantage
An experienced technician brings a lot more to the table than just a spline roller. We're efficient, and we have access to commercial-grade materials you won't find at the local home improvement store. For example, we use extra-wide screen rolls that allow us to cover large panels without creating ugly, weak seams down the middle. We also use specialized tools that pull the screen perfectly taut for a drum-tight finish that lasts.
This professional touch makes a huge difference in the long run. In my experience, around 65% of screen enclosures that aren't professionally inspected can run into major issues within 10 years, with repair bills averaging $923. In the Phoenix area, where UV rays degrade screens up to 20% faster, quality work is even more critical. Getting ahead of these issues with expert maintenance is key, and you can see how the demand for better solutions is growing by looking at detailed retractable screen market research.
Making the Smart Investment
Ultimately, hiring a professional for a complex screen enclosure repair is an investment in your property and your peace of mind. If you’re a property manager, professional upkeep can head off nearly 50% of common HOA violations. And if you're selling, realtors will tell you that homes with pristine enclosures can sell up to 12% faster.
A pro gets the job done right the first time, using the correct materials and techniques to handle our intense climate. This stops the frustrating cycle of failed DIY patches and keeps your outdoor space safe and beautiful for years to come. If you're on the fence, getting a professional quote can help you weigh your options. You can find more details about local window and screen repair services to see what’s involved.
Common Questions About Screen Enclosure Repair
No matter how detailed a guide is, you’re bound to have questions about your own patio enclosure. That’s completely normal. After years of working on screen enclosures all over the Phoenix area, I’ve heard just about every question you can imagine.
Let's walk through some of the most common ones I get from homeowners. My goal here is to give you straight answers based on real-world experience, so you can feel confident about what to do next.
How Much Does Professional Screen Enclosure Repair Cost in Phoenix?
The price for a professional repair can swing quite a bit. It really boils down to three things: how bad the damage is, what kind of screen you want, and how tricky the spot is to get to. For a single, standard-sized panel, most homeowners in the Valley should plan on a cost between $150 and $400.
Of course, if a monsoon has torn through multiple panels or bent the actual frame, the cost will go up. This is exactly why getting a free, itemized quote is so important. It’s the only way to lock down the exact price for your job and make sure there are no surprises later.
A professional repair isn't just an expense—it's an investment in your home. Using the right materials and getting the tension perfect from the start can save you from bigger headaches and more costs down the road.
Can I Use Standard Window Screen for My Patio Enclosure?
I hear this question a lot, and the answer is always a firm "no." It might seem like a smart way to save a little cash, but it’s one of the most common DIY mistakes I see, and it never ends well.
Patio enclosure panels are massive compared to windows and need a huge amount of tension to keep them from sagging. Standard window screen just isn't built for that kind of stress. It will almost certainly start to droop within a few weeks and is far more likely to tear in the wind.
For a repair that actually lasts, you have to use screen material specifically made for enclosures.
- Heavy-Duty Fiberglass: This is the workhorse screen, perfect for most general repairs.
- Pet-Resistant Screening: A must-have for durability if you have dogs, cats, or even young kids who might push on the screen.
- Solar Screening: An amazing upgrade for those sun-blasted panels, which is a big deal here in the Valley.
How Can I Make My Screen Enclosure Last Longer in the Arizona Sun?
In our climate, a little proactive maintenance goes a long way. The intense Arizona sun is the number one enemy of your screen, but you can definitely fight back.
First, get in the habit of cleaning your screens twice a year. Just use a soft brush and some mild, soapy water to gently scrub away the dust and grime that can break down the screen material over time.
When it's time to rescreen, give serious thought to upgrading to a UV-resistant solar screen, especially for the panels on the south and west sides of your house. These screens are designed to block a huge chunk of those damaging rays, which protects the screen itself and helps keep your patio feeling a lot cooler.
Finally, inspect your enclosure before and after every monsoon season. Spotting and patching a small tear is a simple 15-minute job. Ignoring it until a storm rips the entire panel out is a much bigger and more expensive problem. A quick trim of any nearby tree branches that could scrape the screen in high winds is another easy win.
What Is the Difference Between Rescreening and a Full Replacement?
People often use these terms interchangeably, but they describe two very different jobs.
Rescreening is what most people are talking about when they say "screen repair." This job involves replacing only the fabric screen and the rubber spline that holds it in the frame. The existing aluminum structure is left completely untouched. It's the go-to solution for tears, sun rot, and general wear and tear.
A full replacement, on the other hand, is a full-blown construction project. We're talking about tearing down the entire structure—aluminum frame and all—and building a new one from the ground up. This is only necessary for severe structural damage, like a frame that's been badly bent or has major corrosion.
Keeping up with timely rescreening is the best way to protect your frame's integrity and avoid the massive cost of a full replacement.
When the job feels too big to tackle yourself, or you just want the assurance of a professional finish, our team at Sparkle Tech Window Washing LLC is ready to help. We offer expert screen repair and replacement services across the Phoenix metro, guaranteeing a durable, high-quality result every time. Contact us today for a free, no-obligation quote.