

So, is it really worth the effort to clean your own solar panels? If you're a homeowner anywhere in the Phoenix area, the answer isn't just yes—it's an absolute must. A dirty panel is an underperforming one, and that fine layer of Arizona dust is quietly costing you money every single day.
The Hidden Costs of a Dirty Solar System
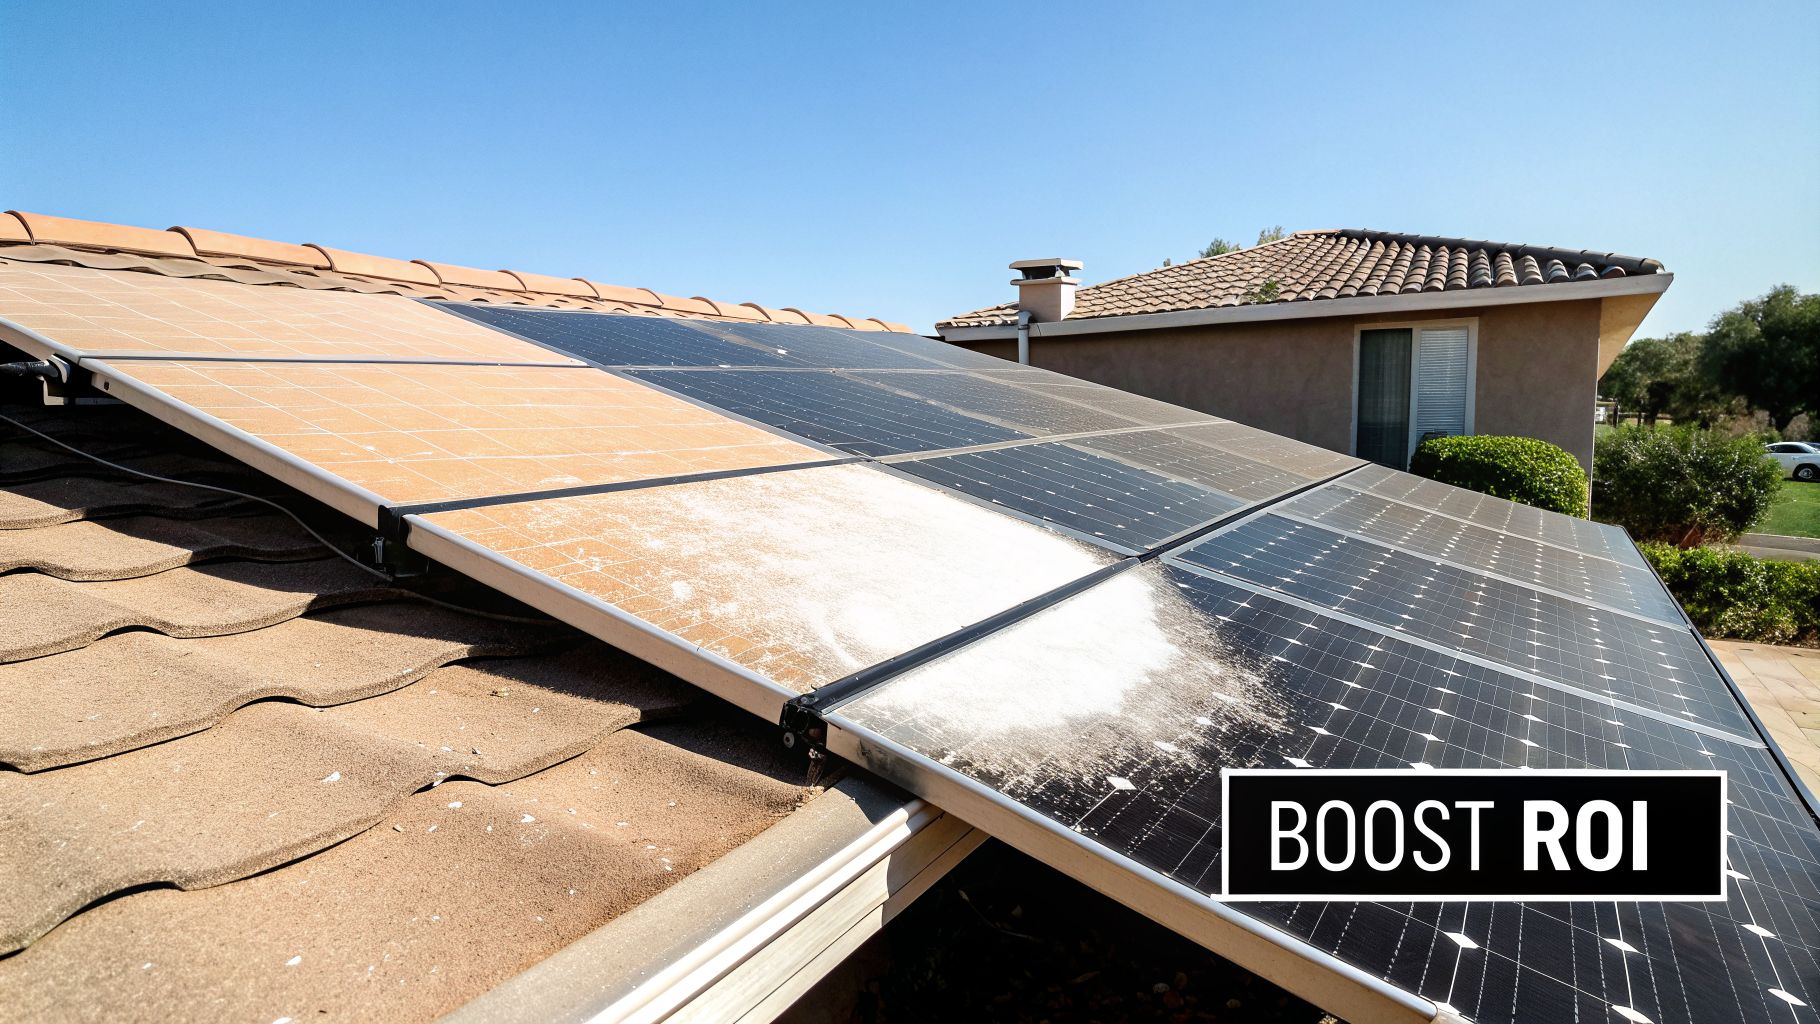
Think of your solar panels as the engine of your home's energy savings. When they're caked in grime, they simply can't capture the full power of the sun. This isn't a small dip in performance; it's a direct hit to your wallet, resulting in higher utility bills and a slower return on your big investment.
Here in Scottsdale, Phoenix, and the surrounding desert, "soiling"—the industry term for this buildup—is a constant battle. We're not just talking about a little dust. It’s a stubborn mix of fine sand, seasonal pollen, pollution, and the dreaded bird droppings, all baked onto the glass by our intense sun. Every layer blocks precious sunlight from ever reaching the solar cells.
The Financial Toll of Neglected Panels
You’d be shocked at how much money can be lost to a bit of dust. It's not just pocket change. In dusty climates like ours, studies show that built-up grime can slash your panel efficiency by up to 25% in a matter of weeks, especially after a haboob or during a long dry spell.
Just look at the numbers. Industry data reveals that soiling can cause efficiency losses averaging 3-5% per month in arid regions. During dry seasons, that can easily climb to over 20%. For a typical 10kW residential system, a 25% loss in efficiency translates to losing over 900 kWh of energy production over a year. At an average rate of $0.13/kWh, that's more than $117 you're basically giving back to the utility company.
A quick DIY solar panel cleaning routine puts that money right back in your pocket. It's one of the few home maintenance tasks that offers an almost immediate financial payback.
What Exactly Is Covering Your Panels?
In the Phoenix metro, we deal with a specific cocktail of contaminants that makes regular cleaning non-negotiable. Knowing what you're up against helps explain why a quick spray with the garden hose often isn't enough.
- Desert Dust and Sand: After a windstorm or haboob, these fine particles settle into a uniform film that severely dims sunlight.
- Bird Droppings: These are not only unsightly but also highly acidic. When baked on by the sun, they can create "hot spots" that permanently damage the solar cells underneath if left for too long.
- Hard Water Spots: This is a classic DIY mistake. Cleaning with untreated tap water leaves behind mineral deposits like calcium and magnesium as it evaporates. These spots are tough to remove and can even etch the panel's anti-reflective coating over time.
DIY Cleaning Impact on Solar Performance in Arizona
To put it in perspective, here’s a breakdown of how different levels of soiling can impact a typical residential system in the Phoenix area. The financial losses add up quickly.
| Soiling Level | Estimated Efficiency Loss | Potential Annual kWh Loss (10kW System) | Annual Savings Lost (at $0.13/kWh) |
|---|---|---|---|
| Light Dust & Pollen | 3% – 7% | 390 – 910 kWh | $50 – $118 |
| Moderate Soiling | 8% – 15% | 1,040 – 1,950 kWh | $135 – $253 |
| Heavy Buildup | 16% – 25% | 2,080 – 3,250 kWh | $270 – $422 |
As you can see, a few hours of cleaning a couple of times a year directly translates into hundreds of dollars in recovered energy savings.
A clean solar panel isn’t just an aesthetic choice; it’s a performance necessity. Every day your panels sit dirty, you are voluntarily paying more to your utility company for energy your own system could have produced.
By taking on a DIY solar panel cleaning project the right way, you’re not just wiping off dirt—you're actively protecting your investment and maximizing your energy independence. Plus, as we’ll cover later, it gives you a chance to spot minor issues before they become major problems. If you want to dive deeper, you can learn more about how to maximize solar efficiency with regular panel cleaning in our detailed guide.
Your DIY Toolkit and Essential Safety Checklist
Trying to clean your solar panels without the right equipment is a recipe for frustration and, even worse, potential damage. I’ve seen it happen. You wouldn't use a kitchen sponge to wash your car, and the same logic applies here. Let's walk through the gear you actually need and the safety checks that are non-negotiable.
The goal is simple: get the grime off without scratching the panel's anti-reflective coating. The tools to do this are surprisingly basic, but they have to be the right ones.
The Essential Cleaning Supplies
This is all about a gentle touch and leaving nothing behind but a clean surface.
- A Soft-Bristle Brush: This is the most critical tool. The bristles need to be soft enough that you wouldn't hesitate to use them on your car's paint job. Anything stiffer will inevitably create micro-scratches, which add up over time and slowly kill your panel's efficiency.
- A High-Quality Squeegee: A good, pliable rubber blade makes all the difference for a streak-free finish. A cheap, hardened squeegee will just smear dirt and hard water minerals around.
- An Extension Pole: Unless you have a ground-mounted system, a sturdy extension pole is your most important safety tool. It lets you do most, if not all, of the work from the ground or a stable position near the roof's edge.
- Microfiber Cloths: Keep a few of these handy. They're great for wiping down the panel frames or carefully tackling a stubborn spot of bird droppings up close (if you can reach it safely).
A Word of Warning: Never, ever point a pressure washer at your solar panels. That intense spray can easily blast water past the seals, leading to electrical shorts and permanent damage. It’s the fastest way to void your warranty and turn a free cleaning job into a four-figure replacement.
Water and Cleaning Solutions
Here in Arizona, what you wash with is just as important as what you wash with it. This is where most DIY cleanings go south.
Our tap water is notoriously hard—it's loaded with minerals like calcium and magnesium. When that water evaporates in the Phoenix heat, it leaves behind a crusty, white film. These mineral deposits don't just block sunlight; they can actually etch the glass over time, causing permanent performance loss.
The only real solution is using deionized (DI) or purified water. Because this water has zero mineral content, it dries completely clean, with no spots. You can find small DI filter systems online that hook right up to a garden hose. For anyone in the Valley serious about DIY, it’s a smart investment.
What about soap? If you're dealing with caked-on grime, a single drop of a simple, pH-neutral biodegradable soap in your bucket is okay. But you absolutely must rinse it away completely with purified water. Any leftover soap film is just a sticky magnet for more dust. For a deeper look at what to use, we break down the best solar panel cleaner options and what to avoid.
Your Pre-Cleaning Safety Checklist
Before a single tool comes out, we need to talk about safety. A fall from a roof is a life-changing event, and no amount of energy savings is worth that risk.
Run through this mental checklist every single time:
First, shut the system down. Go to your home's breaker box and flip the switch for your solar system to the "off" position. It’s a simple step that separates water from active electrical components.
Next, be honest about your roof. Is it a low-pitch, single-story roof you feel comfortable on? Or is it a steep, two-story tile roof? The latter is a job for a professional with the right safety harnesses and insurance, full stop.
Then, check the day's conditions. The best time to clean is on an overcast day or first thing in the morning when the panels are cool. Trying to clean hot panels is a losing battle—the water evaporates almost instantly, leaving a mess of streaks and mineral spots. And of course, never work in windy or rainy weather.
Finally, if you do go up, plan your path. Wear shoes with fantastic grip, and never, ever step directly on the solar panels or their conduit and wiring. You can cause micro-cracks in the solar cells that are invisible to the naked eye but will absolutely degrade your system's output.
A Practical Guide to Cleaning Your Solar Panels
Alright, you've got your tools laid out and you’ve gone through the safety checklist. Now comes the satisfying part: getting that grime off and restoring your panels to their full potential. A proper DIY solar panel cleaning isn't just a quick spray-down; it’s a specific process that you'll need to adapt based on where your panels are installed.
No matter the setup, the core rules don't change: work cool, work wet, and be gentle. The best time to get this done is early in the morning or on a rare overcast day here in Arizona. Why? Because cleaning hot panels is a recipe for disaster. The water evaporates almost instantly, leaving behind stubborn hard water spots and soap streaks that are a pain to remove.
The Ground-Level Cleaning Approach
If you were lucky enough to get a ground-mounted system, your job is about as straightforward as it gets. This is by far the safest and easiest way to do a DIY clean since you can work thoroughly without a ladder in sight.
Start with a gentle pre-rinse using a standard garden hose on a low-pressure setting. All you're trying to do here is knock off the loose dust and surface debris. It's just like rinsing your dishes before you scrub them—it makes the real work easier and prevents you from grinding that gritty sand into the glass.
Next, dip your soft-bristle brush into your bucket of purified water (and that single drop of soap, if you’re using it) and start washing one panel at a time. Always work from the top down with light, overlapping strokes. You don't need to put a lot of muscle into it; the soft bristles and water will do the heavy lifting.
As soon as you finish scrubbing a panel, rinse it immediately and thoroughly with your purified water. Any soap film left behind is a magnet for fresh dust. Now for the most important step: the squeegee. Start at the top edge of the panel and pull the squeegee straight down in one clean, continuous motion. Overlap each pass by an inch or so, and be sure to wipe the blade clean with a microfiber cloth after every single pull. This is what separates a DIY job from a professional, streak-free finish.
Tackling Rooftop Solar Panels
When your panels are on the roof, the game changes, and safety becomes your absolute top priority. For most single-story homes, you can often do this job safely from a sturdy ladder positioned at the roof's edge, using an extension pole for your tools.
The actual cleaning process is the same as the ground-level method, but you're dealing with the challenge of distance. Attach your soft brush to the pole, dip it, and start scrubbing the panels. I always recommend starting with the panels farthest from you and working your way closer. This simple trick stops you from dripping dirty water all over the panels you just cleaned.
After scrubbing, switch to your hose with a low-pressure nozzle and rinse everything from the top down. Using a squeegee on an extension pole is where most people struggle. The key is to maintain a consistent 30-degree angle between the blade and the glass. This angle allows the blade to shear the water off cleanly without skipping or chattering across the surface. It definitely takes some practice to get the feel for it, but it's crucial for avoiding streaks.
Pro Tip: If you're cleaning a large rooftop array, don't try to do it all at once. Break the job down into small sections of two or three panels. Fully scrub, rinse, and squeegee one section before you even think about starting the next. This ensures nothing has a chance to dry on the panel before you can get it clean.
Handling Stubborn Grime and Contaminants
Every now and then, plain water and a light scrub just won't cut it, especially with baked-on bird droppings or a thick layer of pollen. These spots require a little more finesse.
- Bird Droppings: The secret is to rehydrate them. Never, ever try to scrape them off dry—you'll scratch the glass. Spray the spot generously with your water and just let it soak for a few minutes. Once it’s softened up, it should lift right off with your soft brush.
- Pollen and Tree Sap: Sticky stuff can be tough. After a pre-rinse, use your brush with a mildly soapy solution and gently work on the area. Let it sit for a minute to break down the residue before you scrub again and rinse completely.
This simple diagram breaks down the essential flow of the cleaning process.
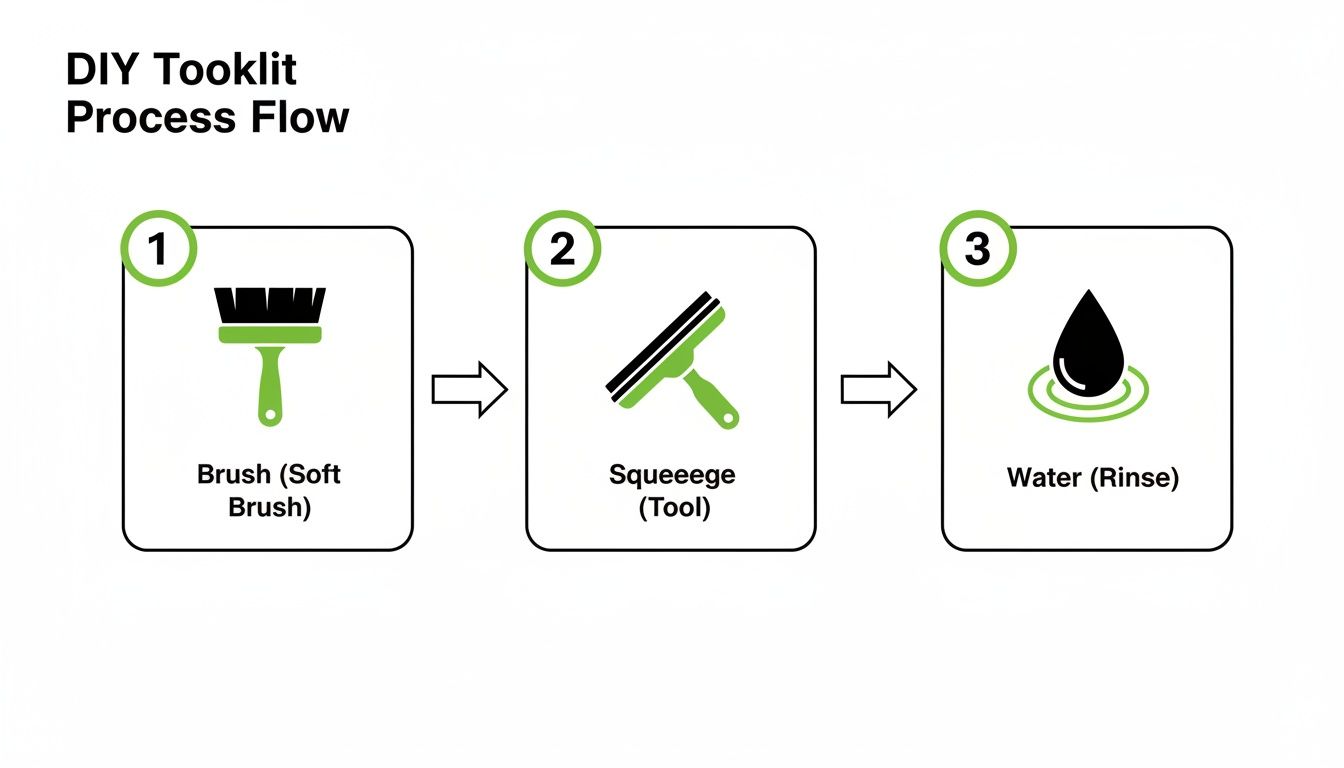
As you can see, your DIY toolkit really comes down to three actions: brushing to loosen the grime, rinsing it away with pure water, and squeegeeing for that perfect, spot-free result.
While large-scale solar farms are turning to automated solutions, these fundamental techniques are incredibly effective for homeowners. While typical dust and dirt can reduce your efficiency by 2-5%, I've seen severely neglected panels lose up to 25% of their output. A good DIY solar panel cleaning every few months brings them right back to peak capacity, which is vital when you remember that panels already degrade by about 0.5% naturally each year. Residential systems under 20kW, which are common around Gilbert and the rest of the Valley, frequently see a 10-15% boost in performance immediately after a cleaning. You can dive deeper into the market trends and data on solar panel cleaning to understand the industry's growth.
By tailoring your cleaning method to your home’s setup and using these tried-and-true techniques, you can safely and effectively get your system producing the maximum amount of power.
Smart Strategies for Arizona's Unique Challenges

Cleaning solar panels here in Arizona isn't like anywhere else. The same intense sun that makes our state a solar paradise can also make cleaning a nightmare. When you combine that heat with our local dust and water quality, you get a unique recipe for caked-on grime that can seriously cut into your energy savings.
The number one enemy is the heat itself. If you try to wash your panels in the middle of a Phoenix afternoon, the water will literally flash-evaporate on contact. This leaves behind a crust of whatever minerals were in the water, trading a layer of dust for a layer of stubborn hard water spots.
Battling Hard Water and High Heat
Arizona's notoriously hard water is a real problem for anyone attempting a DIY solar panel cleaning. When you spray your panels with an untreated garden hose, you're basically coating them in dissolved rock. As soon as that water vanishes in the desert heat, a chalky film of calcium and magnesium is left behind.
The only surefire way to get a spot-free finish is to use pure, mineral-free water. For the committed DIYer, a small deionized (DI) water filtration system is a complete game-changer. It strips out all the total dissolved solids, meaning the water evaporates cleanly without leaving a single spot.
If a DI system isn't in the cards, your best bet is to work when it's cool. I'm talking about getting started right at dawn before the sun has had a chance to really heat up the glass. This gives you a critical window to squeegee the panels dry before the sun does the job for you—and leaves its mineral signature behind.
Embracing Water-Wise Dry Cleaning Methods
Living in the desert, we all know water conservation is a big deal. This has led to some really effective "dry" and low-water cleaning methods that are perfect for the routine dust-offs, especially after a haboob rolls through and covers everything.
This push for water-wise DIY solar panel cleaning is becoming standard practice in sun-drenched communities like Goodyear and Surprise. During those punishing 110°F summer stretches, more people are choosing brushes over hoses to keep their panels running at 95%+ efficiency. You can actually remove up to 90% of loose dust just with a leaf blower and an electrostatic duster. That’s a big deal when you consider Phoenix's alkaline dust can cause an annual energy loss of 17% if left unchecked, according to one study. You can dive deeper into these trends in this detailed industry report.
Here’s a practical dry-cleaning approach that works:
- Blow It Off First: Grab a leaf blower (electric is better to avoid oily exhaust) and blast away all the loose dust and debris. Always work from the top of the panels down.
- Follow Up with a Brush: Next, use a very soft brush on an extension pole to gently sweep off any clinging dust the blower couldn't get. A light touch is key here to avoid any risk of scratching the glass.
- Spot-Treat as Needed: For stubborn bird droppings or smudges, a slightly damp microfiber cloth is perfect for targeted cleaning without having to drench the whole array.
Your Arizona Solar Cleaning Schedule
Forget a rigid calendar—timing your cleaning in the desert is all about reacting to our specific weather and seasons.
- Post-Haboob (Immediately): After a dust storm, you need to act fast. A quick dry clean or rinse is essential before that thick layer of dirt has a chance to bake onto the glass.
- Spring (March-April): This is when the pollen comes. A full wet wash is usually the only way to get rid of that sticky yellow film that a blower won't touch.
- Late Summer (September): Once the monsoon season wraps up, it's a great time to clean off all the accumulated grime and water spots to get your panels ready for the high-production fall months.
- As Needed: The best tool you have is your system's monitoring app. If you see a sudden, noticeable dip in your energy production, it’s a sure sign your panels are crying out for a wash.
Knowing When to Call in a Professional
While cleaning your own solar panels can feel empowering and save you a few bucks, there are definitely times when it's not just impractical—it's dangerous. Knowing your own limits is the smartest thing you can do for your system and your well-being. The goal here is clean panels, not a trip to the emergency room.
Frankly, the biggest factor is always safety, which usually boils down to your roof. If it's a tricky setup, it's time to let a professional service like Sparkle Tech handle the job.
Red Flags That Signal It's Time to Hire a Pro
Some situations should be non-negotiable. If any of these sound like your home, my advice is to pick up the phone instead of a ladder.
- Two-Story or Taller Homes: Working at that height without professional-grade safety gear and training is a massive risk. An extension pole from the ground rarely gives you the right angle or pressure to get the panels truly clean, anyway.
- Steeply Pitched Roofs: If a roof feels even slightly uncomfortable to walk on, it's a job for an insured professional. They have the experience and equipment to navigate those angles safely. It’s what they do every day.
- Slippery Roof Surfaces: Those beautiful tile roofs so common in Arizona? They get incredibly slick with just a little bit of water. A pro knows how to manage this, but for a homeowner, it’s a serious accident waiting to happen.
The rule of thumb I always tell people is simple: If you hesitate for even a second about getting on your roof, don't do it. A professional service isn't just about convenience; it's about transferring that risk to trained experts who are equipped and insured to handle it.
When DIY Cleaning Just Isn't Enough
It's not just about staying off a dangerous roof. Sometimes, a simple DIY wash just won't cut it, and you need the heavy-duty gear and expertise a professional team brings to the table.
If you’ve done the work yourself but still see hazy spots or a cloudy film, you're almost certainly looking at caked-on mineral buildup. This is the classic sign of using hard tap water, which etches minerals right into the glass over time. Professionals use commercial-grade deionized water systems that leave a perfect, spot-free finish and can often improve minor existing damage.
On top of that, a trained technician can spot problems you might easily miss. Think loose wiring, cracks in a panel's frame, or signs that pigeons have started nesting under your array. A good cleaning service always includes a quick visual inspection, giving you another set of expert eyes on your valuable investment.
DIY vs. Professional Solar Panel Cleaning
So, how do you decide? It really comes down to weighing the upfront cost against the safety, time, and quality of the final result. While doing it yourself saves money, a professional service offers peace of mind and far superior cleaning.
Here’s a quick look at how the two approaches stack up.
| Factor | DIY Cleaning | Professional Service |
|---|---|---|
| Safety | High risk on multi-story or steep roofs. Your safety is entirely on you. | Low personal risk. Professionals are trained and insured for working at heights. |
| Effectiveness | Good for light dust, but often leaves streaks or hard water spots if not done perfectly. | Superior, streak-free results using purified water systems that prevent mineral buildup. |
| Time & Effort | Can take a few hours of your weekend, plus the initial cost and storage of equipment. | Fast and efficient. A trained team can often finish the entire job in under an hour. |
| Inspection | You're limited to what you can see and may not recognize the early signs of a technical problem. | Technicians often spot potential issues like corrosion, pest damage, or loose mounting. |
At the end of the day, if your panels are tough to get to or you want a guaranteed, perfect finish without the hassle, calling in the pros is the right move. Many homeowners find a hybrid approach works best: they handle the easy, quick rinses from the ground and schedule a service like Sparkle Tech Window Washing once a year for a deep, professional cleaning and inspection.
Common Questions About Solar Panel Cleaning
Even after you’ve got a game plan, a few questions always pop up before you start a DIY solar panel cleaning. Let's walk through some of the most common ones I hear from homeowners around the Valley. Clearing these up should give you the confidence to get the job done right.
How Often Should I Clean Solar Panels in Arizona?
For dusty places like Phoenix and Scottsdale, cleaning your panels every 3 months is a solid starting point. But your best tool for knowing when it's time is actually your system's monitoring app. If you see a noticeable dip in energy production that isn't just from a few cloudy days, it’s probably time to get them washed.
Think about it—our desert environment is relentless. I always recommend planning for an extra cleaning right after a big dust storm (a haboob) or during that heavy spring pollen season. This keeps that grime from baking on and ensures your system is always running at its best.
A proactive cleaning schedule is far more effective than a reactive one. By the time you see a major drop in production, you've already lost money on your energy bill. A quick rinse after a dust storm prevents that layer from turning into a caked-on mess.
Can I Use Tap Water and Dish Soap?
I get this question all the time, and the answer is a firm no—at least not for the final rinse. Our tap water in Arizona is incredibly hard. If you let it dry on your panels, it will leave behind chalky mineral spots from calcium and magnesium. Over time, these can permanently etch the anti-reflective coating, which hurts your panels' efficiency for good.
As for soap, a tiny drop of a mild, biodegradable dish soap in a bucket of water is generally fine for cutting through tough grime. The real key, though, is the rinse. You absolutely have to use purified or deionized water to wash away every bit of that soap. If you don't, you're left with a sticky film that becomes a magnet for more dust, completely undoing all your hard work. This is one of the main reasons professionals get a longer-lasting, streak-free clean.
Will Cleaning My Panels Void the Warranty?
Usually, no, it won't—as long as you stick to the manufacturer's cleaning guidelines. What will get you in trouble and potentially void your warranty is using the wrong tools or harsh methods.
The biggest mistakes I see that put a warranty at risk are:
- High-Pressure Washers: That intense spray can easily break the seals around the panel frames, allowing moisture to seep in and cause electrical failures.
- Abrasive Chemicals: Harsh cleaners, degreasers, or solvents can strip the panel's delicate anti-reflective coating.
- Stiff Brushes or Scrapers: You might think you're scrubbing away grime, but you're actually creating tiny scratches on the glass that add up over time and reduce your energy output.
Always use a soft-bristle brush designed for solar panels and a low-pressure water flow. When in doubt, take five minutes to pull up your panel manufacturer’s documentation online. Of course, the safest bet to protect your warranty is to hire a fully insured professional.
What Is the Safest Way to Clean Panels on a Two-Story Home?
From the ground. The only truly safe way for a homeowner to clean panels on a second-story roof is with a water-fed extension pole that has a soft brush attachment. If you can't reach all of your panels comfortably and effectively from the ground, that’s your cue to call a pro.
It's just not worth the risk. Professionals have the training and specialized safety gear—harnesses, standoffs, and proper ladders—to work at height without endangering themselves or your property. A fall from a tall ladder can have devastating consequences. Digging into how often to clean solar panels can also help you weigh the costs and benefits of doing it yourself versus hiring out.
If your roof is too high, too steep, or you'd just rather have the peace of mind that comes with a perfect, professional finish, Sparkle Tech Window Washing LLC is here to help. Our experienced, insured team uses state-of-the-art purified water systems to guarantee a spot-free clean that protects and maximizes your solar investment. Schedule your service today at https://sparkletechwindowwashing.net.