

Figuring out the best way to clean your blinds really comes down to two things: what they're made of and how dirty they've gotten. A quick dusting often does the trick for a light refresh, but a deep clean might mean anything from spot-treating with a bit of soap and water to giving them a full-on bath.
Your Guide to Perfectly Clean Blinds
Trying to stay on top of dusty blinds can feel like a losing battle. If you live in a place like Phoenix, you know exactly what I'm talking about—that fine desert dust settles on every surface, sometimes seeming to reappear just hours after you’ve cleaned.
This guide is about more than just appearances, though. We’ll show you how to clean every type of blind, not only to make them look great but to actually improve your home’s air quality. We're sharing the professional techniques we've refined over years of hands-on experience, adapted so any homeowner can get fantastic results.
Beyond a Simple Wipe Down
Cleaning blinds correctly is about more than just grabbing a duster. The wrong approach can do real harm—using water on real wood can cause warping, while a harsh chemical might discolor vinyl. My goal here is to give you the confidence to tackle any blind-cleaning job without worry.
Think about it: Your blinds are one of your home's first lines of defense, trapping dust, allergens, and other particles. Cleaning them properly is a huge step toward maintaining healthier indoor air.
Consider this your personal playbook for making your blinds look brand new again. We'll get into the specific, actionable steps for all the common materials you'll encounter.
- Aluminum and Vinyl: These are tough and can usually handle a more thorough cleaning.
- Real and Faux Wood: They need a gentler touch to protect their beautiful finish.
- Fabric and Cellular Shades: Special care is needed here to avoid stains or damage.
- Vertical Blinds: Their size and shape present their own unique cleaning puzzle.
Once you understand these differences, you'll be able to avoid common mistakes and get that professional-level clean every single time. Let's get started on bringing that sparkle back to your windows.
Essential Tools and Cleaners for Every Blind Type
The difference between a frustrating afternoon of cleaning blinds and a quick, satisfying job often comes down to what's in your cleaning caddy. You don't need an arsenal of professional gear, but a few specific items will let you clean any blind safely and effectively. In a place as dusty as Phoenix, starting with the right tools is half the battle.
Your First Line of Defense: Dusting and Wiping
When it comes to the fine layer of desert dust that settles on everything, your goal is to trap it, not just send it airborne. That’s why your number one tool should be a microfiber cloth or a dedicated microfiber blind duster. Unlike old-school feather dusters that just flick dust around, microfiber's natural static charge grabs onto particles and holds them tight.
A vacuum cleaner with a soft brush attachment is another must-have. It’s fantastic for gently lifting dust from delicate fabric shades or getting into the nooks and crannies of the headrail. Just make sure to use the lowest suction setting; too much power can easily stretch or warp the material.
Pro Tip: For a quick weekly touch-up, close the blinds completely and wipe them top-to-bottom with a dry microfiber cloth. Then, flip the slats the other way and repeat. This simple trick takes less than a minute per window and makes a huge difference in preventing buildup.
For a deeper clean, you rarely need more than a bowl of warm water with a few drops of gentle dish soap. This simple solution is a workhorse, easily cutting through grime on most vinyl and aluminum blinds without leaving a sticky residue.
Choosing the Right Cleaning Solution
While soap and water are great for general cleaning, certain materials need a more specialized approach. Knowing what's safe for your specific blinds is critical to avoid accidental damage.
- Real Wood Blinds: Water is the enemy here. Always use a high-quality wood cleaner or a furniture polish designed to condition the wood. This not only cleans but also helps protect the finish from the intense Arizona sun.
- Faux Wood and Vinyl: These are the tough ones. They can easily handle the simple soap-and-water method. If you're dealing with stubborn, greasy buildup in the kitchen, a mild degreaser can be used sparingly.
- Fabric Shades: Your best bet is to spot-treat stains with a dedicated upholstery cleaner. If you want to try a DIY approach, a mixture of mild soap and water can work, but always test it on a hidden spot first to check for color-fastness.
Blind Cleaning Toolkit At a Glance
To make it even easier, here’s a quick reference table to help you grab the right tools for your specific blinds.
| Blind Material | Recommended Tool | Recommended Cleaner | Best For |
|---|---|---|---|
| Aluminum & Vinyl | Microfiber cloth, soft sponge | Dish soap & water, 50/50 vinegar solution | General dirt, grime, and fingerprints. |
| Faux Wood | Microfiber cloth, vacuum brush | Dish soap & water, mild degreaser | Everyday dust and heavier kitchen grease. |
| Real Wood | Dry microfiber cloth, specialty duster | Wood cleaner or furniture polish | Dusting and protecting the wood finish. Never use water. |
| Fabric/Cellular Shades | Vacuum with brush attachment | Upholstery spot cleaner, mild soap solution | Lifting dust and treating isolated stains. |
| Vertical Blinds (Vinyl/PVC) | Microfiber cloth or two cloths (pinch & wipe) | Dish soap & water | Wiping down individual slats quickly. |
This simple kit prepares you for almost any cleaning scenario, from a quick dusting to a more thorough wash.
If you prefer to buy pre-made cleaners, it's a great idea to look for plant-based, non-toxic options. We cover some of our favorites in our guide to the best eco-friendly cleaning products for your home. A simple 50/50 mix of white vinegar and water also works as a fantastic natural cleaner and disinfectant for any non-wood, non-fabric blinds.
Ultimately, having the right supplies on hand makes routine maintenance feel less like a chore and more like a quick refresh. You’ll be amazed at how much brighter a room feels with truly clean blinds.
How to Clean Different Types of Blinds
Now that your cleaning tools are ready to go, we can get into the specifics. The secret to cleaning blinds without a headache is knowing that the method depends entirely on what they’re made of. What works like a charm on a sturdy vinyl blind could completely ruin real wood, so let’s match the right technique to the right material.
This is my go-to approach. I always start with the easiest method first and only move on to a deeper clean if it's truly necessary.
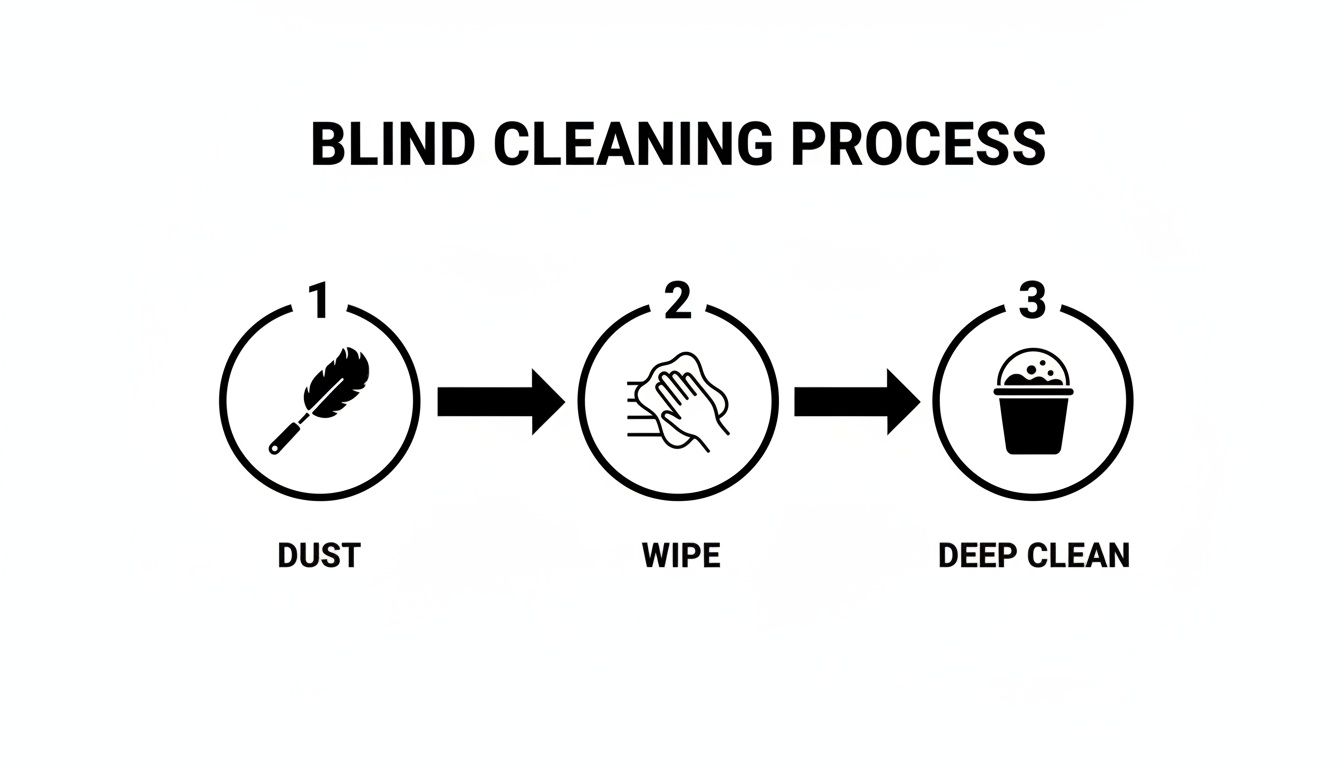
Honestly, a quick dusting or wipe-down is usually all you need. Save the deep clean for when the grime really starts to build up.
Cleaning Aluminum and Vinyl Blinds
Good news—these are usually the easiest to clean because they’re tough and water-resistant. For routine dusting, a microfiber duster or cloth is your best friend. Just close the slats, wipe them down, then flip them the other way and repeat. Simple.
But when they get caked with stubborn dust or that sticky kitchen grease, it’s time to bring out the big guns: the bathtub method.
The Bathtub Method for a Deep Clean:
- First, get the blinds off the window. Don't worry, it's usually just a simple clip or latch you need to release.
- Next, prep the tub. I always lay an old towel down first to keep the tub from getting scratched. Fill it with a few inches of warm water, add a good squirt of gentle dish soap, and maybe a cup of white vinegar to really cut through any grease.
- Lay the blinds in the tub, making sure they’re fully extended, and let them soak for about an hour. Every now and then, give them a little swish to help loosen up all that gunk.
- After the soak, grab a soft sponge and gently wipe down each slat. Then, drain the tub and give the blinds a thorough rinse with your showerhead.
- Drying is the most important part! Hang them over the shower rod or lay them on towels outside in the shade. Before you even think about rehanging them, make sure they are 100% dry. Any lingering moisture can cause water spots or rust out the internal parts.
Handling Faux Wood and Real Wood Blinds
This is where you need to pay close attention. Faux wood and real wood can look alike, but they need completely different approaches to avoid causing damage.
Faux wood blinds give you a bit more leeway. They’re made from a composite material designed to handle moisture, so you can safely use a damp microfiber cloth with a mild soap-and-water solution. Just be sure to wipe them dry afterward to prevent spotting.
Real wood, however, is a whole different story.
Water is the number one enemy of real wood blinds. I've seen it happen—even a little bit of moisture can cause the wood to warp, swell, or get discolored, especially in the intense Phoenix sun.
For real wood blinds, you need to stick to a dry cleaning process.
- Dust Often: A dry microfiber cloth or a dedicated wood duster is all you need for regular upkeep.
- Condition, Don't Drown: For a more thorough clean, use a good wood cleaner or conditioner. The trick is to apply it to your cloth, never spray it directly on the blinds. This cleans off grime while also feeding the wood and keeping it from drying out.
Just think of it like your nice dining room furniture. You wouldn’t douse it with water, right? Treat your wood blinds with that same level of care.
Gentle Techniques for Fabric and Cellular Shades
Fabric-based blinds, like cellular or honeycomb shades, are basically dust magnets and require a very delicate touch. If you get too aggressive, you can easily cause fraying, fading, or those dreaded water stains that never come out.
Your best tool for these is your vacuum’s soft brush attachment.
Start by setting your vacuum to the lowest suction setting. Too much power can easily stretch or warp the delicate fabric.
Then, use gentle, horizontal strokes to go over the entire shade. Don't forget to pay attention to the inside of the honeycomb cells—that’s where dust loves to hide. A can of compressed air is also great for gently blowing trapped dust out of those little pockets.
If you have a small stain, deal with it immediately. Grab a fabric spot cleaner, but always test it on a hidden area first, like the very top of the shade inside the headrail. Dab the stain gently; never rub, which can just spread the stain and damage the fabric.
Unless the manufacturer's care guide specifically says you can, never, ever submerge fabric shades in water. That’s a fast track to ruining them completely.
Managing Vertical Blinds
Vertical blinds are a bit unique because of their size and how they hang. Honestly, the best way to clean them is almost always while they're still in place. Taking each vane down is a huge pain and you risk breaking the little clips that hold them up.
For Vinyl or PVC Vertical Blinds:
- I use a "two-cloth method." Get two microfiber cloths—dampen one with a simple soap-and-water mix and keep the other one dry.
- Pinch a slat between the two cloths (damp on one side, dry on the other) and wipe down from top to bottom. The damp cloth cleans while the dry one immediately catches any drips.
- Just work your way across, one slat at a time. It's surprisingly fast and leaves no mess.
For Fabric Vertical Blinds:
- Just like with other fabric shades, start with a good vacuuming using the soft brush attachment.
- For any spots or stains, stick to spot cleaning only with a proper fabric cleaner. Remember to dab, not rub. If you get the whole vane wet, you're asking for water rings and discoloration.
Tackling Blinds in Our Dusty Climate

If you live anywhere in the Phoenix area, from Scottsdale to Peoria, you know the struggle. Dust is more than just a nuisance; it's a way of life. That fine, reddish-brown powder finds its way inside no matter what, settling in a stubborn layer over every single surface—especially your blinds.
But this isn't just about looks. That relentless dust is terrible for your indoor air quality and can actually wear out your expensive window treatments prematurely. To truly master cleaning your blinds here, you have to adopt a routine specifically for our unique desert environment.
Winning the Battle Against Desert Dust
When it comes to Arizona dust, frequency is your best weapon. A light dusting every week or so is far more manageable than tackling a thick, caked-on layer later. Once that dust mixes with the humidity from your AC or a stray splash of water, it creates a grimy paste that’s a real pain to scrub off.
Just a few minutes with a microfiber duster or your vacuum’s brush attachment each week can stop that buildup before it starts. This simple habit keeps your blinds looking great and dramatically cuts down on the allergens floating around in your home's air.
I always tell my clients in the Valley: think of dusting your blinds as part of your regular home maintenance, not a deep-cleaning project. A few minutes each week saves you hours of scrubbing later.
This proactive mindset becomes even more critical during monsoon season. Those powerful dust storms, or haboobs, can plaster a thick, mud-like film onto your blinds seemingly overnight. Being ready to clean them right after a storm passes through is essential.
Shielding Your Blinds from the Intense Sun
Beyond the dust, the harsh Arizona sun is public enemy number one for window treatments. Constant, intense UV exposure makes materials brittle and fades colors. A layer of dust actually makes it worse by trapping heat right against the slats, accelerating the damage.
So, when you clean your blinds, you're not just removing dirt—you're protecting your investment.
- For Wood Blinds: Keeping them clean and occasionally conditioning them with a proper wood cleaner helps prevent the sun from cracking and drying out the finish.
- For Vinyl and Faux Wood: Regular cleaning stops dust from baking onto the surface, a process that leads to permanent yellowing and makes the material brittle.
- For Fabric Shades: Dust particles have sharp, microscopic edges. When agitated by sunlight and daily use, they act like tiny blades, slowly shredding the fabric fibers. Frequent vacuuming is a must.
Understanding these local challenges shows why a simple wipe-down isn't always enough. You need a strategy to protect your blinds from our specific climate. It's all part of a complete home maintenance plan, which also includes keeping your window screens in top shape. You can learn more in our guide on how to properly clean your window screens.
A Practical Cleaning Schedule for Phoenix Homes
A simple schedule can make all the difference. While the overall U.S. window cleaning industry is enormous—generating $2.8 billion in 2023 according to some reports—our needs here are highly specific. You can find more national window washing industry insights on fishwindowcleaning.com.
Here’s an easy and effective schedule designed for Valley homeowners:
Weekly (5-10 minutes):
- Do a quick dry dusting. Close the slats facing down, dust them, then flip them the other way and repeat. A vacuum with a soft brush works wonders.
Monthly (15-20 minutes):
- Give them a more thorough wipe-down. Use a slightly damp microfiber cloth on materials like vinyl or faux wood to grab any grime that dusting left behind.
Seasonally (Especially post-monsoon):
- Check if a deep clean is necessary. For caked-on grime, you may need to take down aluminum or vinyl blinds and give them a good soak in the bathtub.
Sticking to a routine like this doesn't just keep your blinds looking brand new. It actively defends them against the harsh desert elements, helping them last for many years to come.
Troubleshooting Common Blind Cleaning Issues
Even when you follow all the right steps, blind cleaning can throw you a curveball. A stubborn stain might refuse to budge, or a simple mechanical snag can bring your whole project to a halt. Don't worry—this is your go-to guide for those moments, helping you solve common problems without accidentally making them worse.
Think of this as having a pro's advice in your back pocket. We'll tackle everything from that greasy film in the kitchen to frustratingly tangled cords, giving you real solutions to get your blinds looking great again.
Conquering Greasy Kitchen Buildup
Kitchen blinds are magnets for a sticky, grimy film of aerosolized cooking grease mixed with dust. Wiping at it usually just creates a streaky, demoralizing mess. The secret is to cut the grease before you start wiping.
Your best friend here is a simple solution of warm water with a few drops of a good dish soap, which is specifically designed to break down grease. For tougher, caked-on gunk, a 50/50 mix of white vinegar and warm water also works wonders.
Here’s the technique that has never failed me:
- First, get your microfiber cloth damp with your chosen cleaning solution. Never spray directly onto the blind itself.
- Gently press the cloth onto a small section of a slat and just hold it there for a few seconds. This gives the solution a moment to dissolve the grease.
- Now, wipe in one smooth, consistent direction. Avoid scrubbing back and forth, which just pushes the grime around.
- Rinse your cloth often in a separate bowl of clean water. This is crucial to avoid redepositing grease back onto the slats.
- Finish by wiping with a clean, dry cloth to buff away any potential streaks.
This methodical approach actually lifts the grease off the surface instead of smearing it, leaving you with a clean, non-sticky finish.
Dealing with Knotted Cords and Jammed Slats
There are few things more annoying than a tangled pull cord or a slat that stubbornly refuses to tilt. The good news is, it's usually a simple fix. The absolute worst thing you can do is yank on it—that’s a fast track to breaking the internal mechanism for good.
For knotted cords, patience is everything. If you can, take the blinds down and lay them on a flat surface. This makes it much easier to see what you're doing. Gently work the knots out with your fingers. For really tight tangles, I've found a knitting needle or even a barbecue skewer can help you delicately pick the knot apart without fraying the cord.
If a slat is stuck and won’t rotate, the first place to check is the headrail at the top. Sometimes a slat just pops out of its little plastic holder, and you can often snap it right back in. If the whole tilting mechanism seems jammed, look for dust bunnies or debris blocking the gears. A quick shot from a can of compressed air can often dislodge whatever is causing the trouble.
The big takeaway here is that brute force is your enemy. Blind mechanisms are delicate. A gentle touch and a bit of patience will solve most problems, while a frustrated yank can mean a trip to the store for a replacement.
Repairing Bent Slats and Removing Mystery Stains
A single bent aluminum slat or an unknown spot on a fabric shade can ruin the whole look. Fortunately, you don't always have to live with these little imperfections.
For Bent Aluminum Slats:
Carefully take the blind down and place it on a hard, flat surface like a table or clean floor. Lay a ruler or another straight edge over the bent part of the slat and apply gentle, even pressure to flatten it out. For more serious kinks, you can sandwich the slat between two small, flat pieces of wood and carefully use a clamp to apply pressure.
For Stains on Fabric Shades:
First, try to figure out what the stain is. For many common culprits like coffee or juice, a dedicated upholstery spot cleaner is your best bet. The golden rule is to always test the cleaner on a hidden spot first, like the very top or bottom of the shade where it won't be seen. Gently dab—don't rub!—the stain with a clean white cloth. Rubbing can spread the stain and break down the fabric fibers.
While specific data on DIY blind cleaning mishaps is hard to come by, it's a common issue. Broader data on the window cleaning industry from gitnux.org shows just how big the professional market is, partly because mistakes can be costly. To avoid becoming a statistic, always stick to manufacturer-recommended methods for your specific blinds. That simple "test spot" step can truly save you from a cleaning disaster.
Let's be honest, DIY cleaning is fantastic for routine upkeep. But sometimes, tackling your blinds yourself isn't the best move. Knowing when to pass the torch to a professional can save you a world of frustration, protect your investment, and deliver results you simply can't get on your own.
Think about the sheer scale of the job. If your home boasts two-story great room windows or dozens of blinds throughout, what starts as a simple Saturday task can quickly turn into an exhausting—and risky—ordeal. Professionals arrive with the right ladders, scaffolding, and safety protocols to handle those tough-to-reach spots without any danger to themselves or your home.
Scenarios That Demand an Expert
Sometimes, the grime is just too much for a microfiber cloth and some elbow grease. This is especially common for blinds that have been neglected for a few years, accumulating a stubborn, sticky film of dust and kitchen grease. In these cases, the best way to wash blinds is to step aside and let a pro work their magic.
Here are a few other times you should definitely pick up the phone:
- Delicate or High-End Materials: Got custom drapes, silk Roman shades, or those beautiful Hunter Douglas silhouettes? These aren't things you want to experiment on. One wrong cleaning solution can cause permanent discoloration, shrinkage, or warping. It's just not worth the risk.
- Heavy-Duty Grime & Nicotine: If blinds are caked in yellow from years of cigarette smoke or coated in a thick, greasy film, a standard wipe-down won't cut it. Professionals often use ultrasonic cleaning technology, which can safely restore blinds to a like-new condition in a way a DIY soak never could.
- When You're Simply Out of Time: Let's face it, your time is valuable. If the thought of spending your entire weekend scrubbing individual slats fills you with dread, hiring a service is a smart investment in your own sanity and free time.
We've spent years cleaning delicate surfaces like windows and solar panels, so we've learned a thing or two about preventing damage. We know how different materials hold up to cleaners and the harsh Arizona sun, and that expertise guides everything we do.
While we're passionate about making your windows spotless, we also believe in being upfront. For highly specialized tasks like ultrasonic blind cleaning or fabric repairs, we'll gladly connect you with a trusted partner who specializes in that work. To get your whole home looking its best, you might also consider our residential window cleaning services in the Phoenix area, ensuring a crystal-clear view from the inside out.
A Few Final Questions Answered
Even with the best guide, a few questions always pop up. Here are answers to some of the most common ones we hear from homeowners, especially those of us dealing with that famous Arizona dust.
How Often Should I Really Be Cleaning My Blinds in the Phoenix Area?
Living in a dusty climate means your cleaning schedule needs to be a bit more aggressive. That fine, sandy dust doesn't just sit there; it builds up.
I always recommend a quick pass with a microfiber duster or your vacuum's brush attachment at least once a week. This simple step prevents that dust from settling in. Then, about once a month, give them a more thorough wipe-down. This stops that light dust from combining with moisture in the air and turning into a stubborn, grimy film. A full deep clean should only be necessary once or twice a year, or right after a big dust event like a haboob rolls through.
Can I Just Toss My Fabric Blinds in the Washing Machine?
I'm going to give you the short, direct answer: please don't. Unless the manufacturer’s care tag specifically says you can—which is incredibly rare—you should never put fabric blinds in the washing machine.
It’s just too rough. You risk them fraying, shrinking, or getting permanently creased. The right way is to stick with gentle vacuuming for dust and carefully spot-treating any stains with a dedicated upholstery cleaner.
For homes with pets or allergy sufferers, the best defense is frequent, dry dust removal. A weekly once-over with a vacuum that has a HEPA filter is fantastic for trapping dander and dust mites without kicking them back into the air.
This consistent upkeep is far more effective than an intense deep clean every few months. For hard-surfaced blinds like vinyl or faux wood, a simple mix of water and a few drops of mild dish soap is all you need for a safe, non-toxic clean. Just be sure to open a window for some good ventilation.
When life gets too busy, or you have high, hard-to-reach windows, calling in a professional is the easiest way to get a perfect result. Contact Sparkle Tech Window Washing LLC for a free estimate, and let us make your windows and blinds shine. Learn more about our professional services at sparkletechwindowwashing.net.