


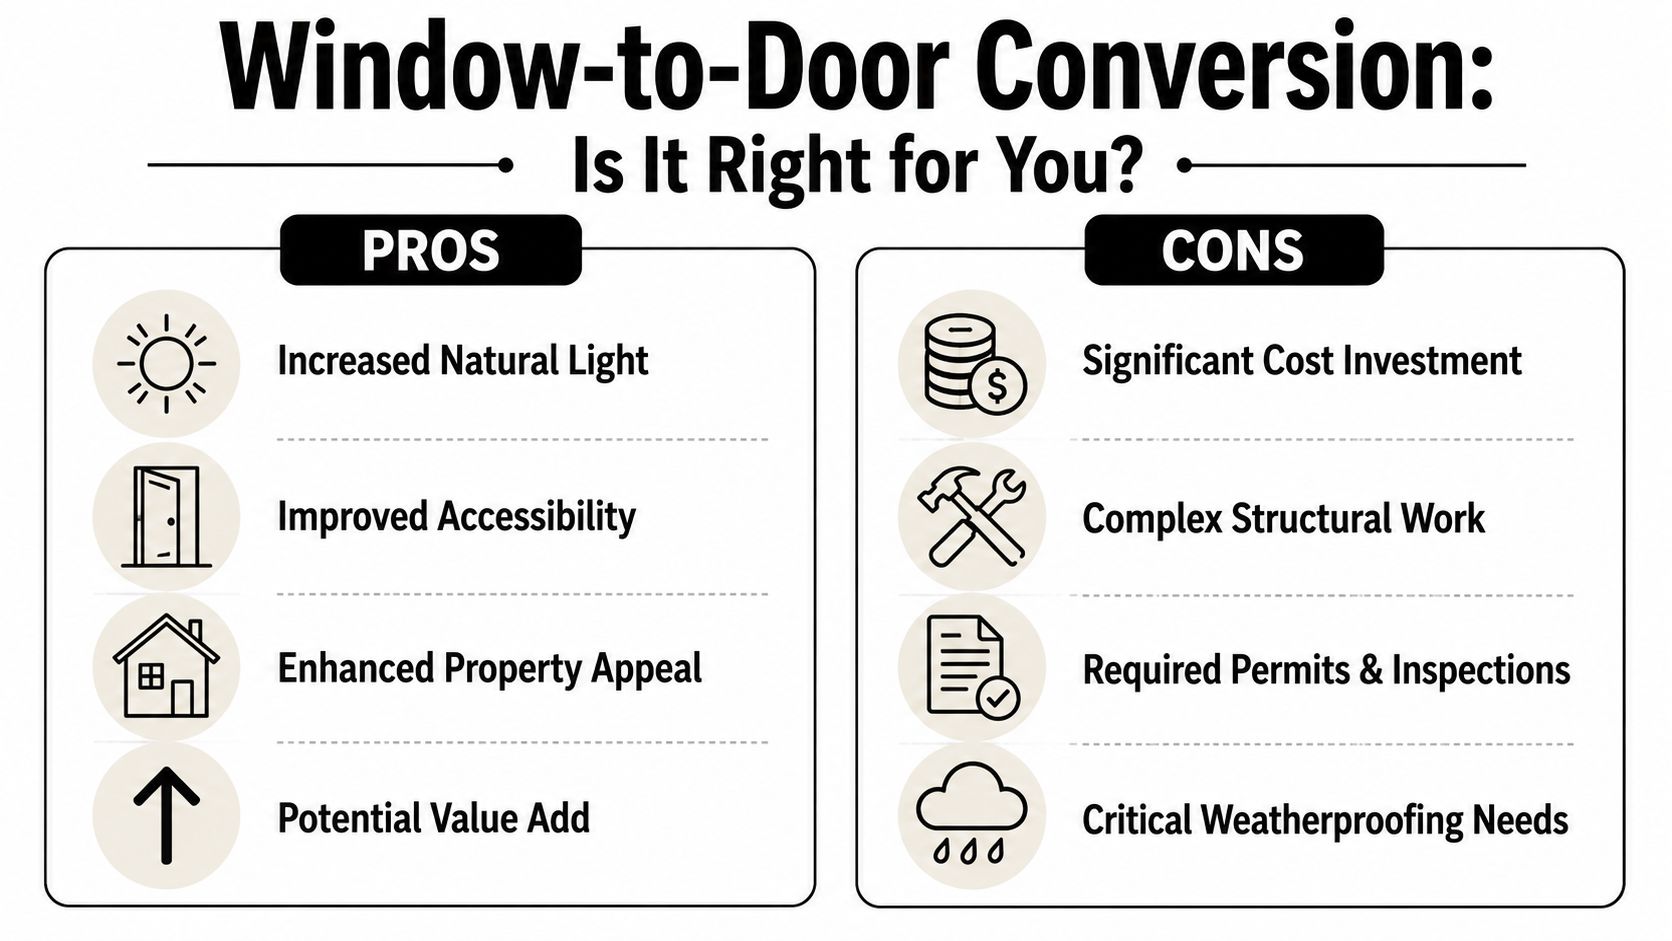
You usually start this project for a simple reason. You're tired of stepping around furniture to reach the patio, you want a cleaner path to the backyard, or you've got a dead wall with a window that doesn't do enough. In Phoenix homes, that idea makes sense. A new door can improve access, light, and resale appeal.
But replacing a window with a door isn't a trim project. It changes framing, weatherproofing, drainage, and long-term maintenance. In the desert, that last part gets ignored far too often. A door opening in a wall that used to be mostly sealed brings in more dust, more thermal movement, and more places for sealant to fail if the work isn't done right.
Planning Your Window to Door Conversion
A good result starts before any drywall dust hits the floor. The decision isn't just about where you want a door. It's about whether that wall can handle the change, whether the opening size matches the door you want, and whether the conversion makes sense for how you use the home.
Start with the reason, not the product
The wrong way to begin is by shopping door styles first. The right way is to ask what problem the new opening solves.
Some common reasons this project works well:
- Backyard access: A former window near a patio, pool, or grill area can become a practical everyday exit.
- Better circulation: Traffic flow improves when people stop crossing the whole house to get outside.
- Aging in place: A more direct route can make a house easier to live in long term.
- Resale logic: Door replacements often hold value well. Data from the National Association of Realtors indicates that installing a steel entry door yields a 100% ROI, fiberglass doors return about 80%, and patio or French doors average 70% to 75% ROI according to this reported summary of NAR figures.
That return matters, but it shouldn't blind you to the construction side. A door is taller, often wider, and more demanding than the window it replaces.
Choose the right door for the wall
A few pairings work better than others in typical Valley homes.
- Sliding patio door: Good when exterior space is tight and you don't want a swinging panel interfering with furniture or walkways.
- French doors: Best when you want a wider opening and a stronger visual statement, but they need room to operate.
- Single entry door: Usually the simplest structural conversion when you're changing a smaller window opening.
Practical rule: Pick the door type only after you know the rough opening you can build without forcing expensive structural changes.
Before ordering anything, measure the existing window width, sill height, wall thickness, and the distance to nearby outlets, switches, cabinets, and corners. Also look outside. In Phoenix, stucco details, irrigation splash, and patio slope matter more than many homeowners expect.
Know when this is not a DIY project
This job crosses into structural work quickly. If the wall is load-bearing, if the opening needs widening, if you have post-tension slab concerns, or if the exterior is block and stucco, bring in a qualified contractor or engineer.
Permits are part of that reality. Most homeowners benefit from reviewing a practical homeowner's guide to permits before starting, especially if the project changes framing or the exterior envelope. And before you hire anyone, use a screening list like these questions to ask a contractor so you don't end up with a crew that can hang a door but can't rebuild the wall around it.
Make the first go or no-go check
Use this quick filter before moving forward:
- Is the new door location useful every day?
- Can the wall be modified without creating awkward steps or drainage issues outside?
- Will the finished threshold make sense with your interior floor height?
- Are you ready for inspections, patching, and exterior finish work, not just door installation?
If the answer is yes on all four, the project is probably worth pricing out.
Demolition and Structural Framing
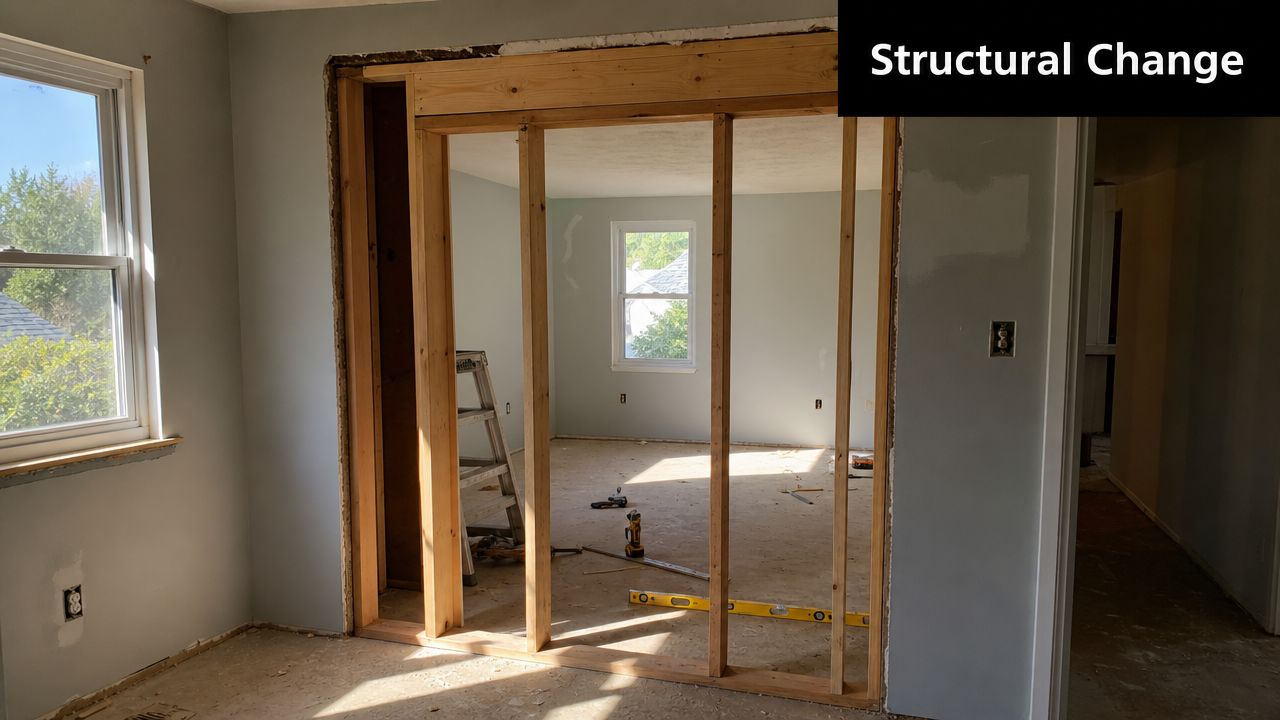
This is the phase where small measurement mistakes become expensive. Homeowners often assume the hard part is cutting out the wall. It isn't. The hard part is rebuilding the opening so the house still carries loads correctly and the new door fits without stress.
Remove carefully, not aggressively
Start inside. Remove casing, stops, sashes, and the existing window frame in sequence. Don't go after it with a demolition bar and hope for the best. If you tear surrounding drywall, stucco returns, or interior plaster loose, you create finish work that has nothing to do with the door itself.
The cleanest jobs preserve as much adjacent material as possible. That gives you better reference lines and cleaner tie-ins later.
The main technical warning is straightforward. The most important risk is structural. Confirming the door jamb width and height before demolition is critical because rough-opening mistakes drive rework, and the new unit has to finish level, plumb, and square with uniform shim support, as noted in this field installation guidance.
Understand what changes in the wall
A standard window opening already has structure around it, but a door changes load paths because it extends down to the floor and often changes width.
The key framing pieces are:
- Header: Carries load across the opening.
- King studs: Full-height studs at the sides of the opening.
- Jack studs: Support the header ends.
- Cripple studs: Short studs above the header if needed.
- Bottom plate removal: Required where the new door opening drops to floor level.
If the wall is load-bearing, temporary support may be needed before you remove framing members. That's not the place for guessing. If there's any uncertainty, get a professional review or a localized structural integrity assessment before the saw comes out.
Don't treat an existing window header as automatically correct for the new door. The opening geometry changes, and sometimes the load assumptions do too.
Build the rough opening for the door, not for the trim
A rough opening isn't the visible finished size. It's the framed cavity that lets the pre-hung unit sit correctly with room for shimming and adjustment.
That's where a lot of DIY conversions go off track. People frame to what looks right, then discover the sill is off, the jamb legs don't seat properly, or the reveal is uneven once the unit is in place.
Check these points before you call framing done:
- Width matches the ordered unit requirements
- Height accounts for finished floor and threshold
- Sides are plumb
- Header is level
- Diagonals are close enough that the opening is square
- Subfloor or slab contact area is solid and flat
A rough opening can look acceptable and still install badly. Lockside binding, uneven margins, and poor weatherstripping contact usually start here.
Here's a useful visual if you want to see a framing sequence before you start cutting:
Common framing mistakes that cost the most
The expensive errors are rarely dramatic. They're the ones that get hidden until trim goes on.
| Framing issue | What happens later |
|---|---|
| Opening too tight | Door frame gets forced in and twists |
| Header not level | Uneven reveal, latch problems |
| No solid bearing below jambs | Threshold movement and air leakage |
| Studs out of plumb | Shimming becomes excessive and unstable |
When the framing is right, the rest of the job gets simpler. When it's wrong, every later step becomes compensation work.
Flashing and Weatherproofing for the Phoenix Climate
In Phoenix, weatherproofing fails for two opposite reasons. The opening gets blasted by sun for months, then gets hit by sudden heavy rain and wind-driven water during monsoon storms. A simple bead of caulk around the exterior trim won't survive that combination for long.
That's why this part of the job deserves more attention than the door brand.
Treat the opening as a drainage system
A durable installation uses layers that guide water out, not just products that try to block it. The opening needs to connect with the wall's existing drainage plane so any water that gets past the exterior finish has a path back out.

Manufacturer installation guidance is clear on the critical points. The door unit must bear on a structural member, and the wall needs a properly integrated water-resistive barrier. A common field benchmark is flashing tape with about a 1/4-inch exterior overhang plus a sealant bead that forms a water-resistant dam at the sill, as described in Andersen's installation guidance.
That 1/4-inch overhang matters because it helps direct water outward instead of letting it curl back into the opening.
The layered approach that works
The order matters. Reverse it, and you can trap water instead of shedding it.
Prepare the substrate
The framing has to be dry, clean, and solid. Loose stucco crumbs, dust, or torn wrap weaken adhesion.Protect the sill first
This is the most vulnerable area. If water gets in, gravity brings it here.Flash the jambs
Side flashing should lap correctly so water moves downward and outward.Set head flashing above
The top detail must send runoff past the opening, not behind it.Integrate with the wall finish
Stucco, siding, trim, and WRB layers all need to work together.
A door doesn't leak because it's a door. It leaks because someone interrupted the wall's drainage path.
Phoenix-specific weak spots
The Valley adds a few headaches:
- UV exposure: Cheap sealants harden, crack, and lose adhesion faster.
- Dust intrusion: Gaps around trim and threshold collect grit that wears surfaces and weatherstripping.
- Stucco transitions: Improper patching at cut edges lets hairline cracks turn into water-entry paths.
- Low patio slope: Water can sit near the threshold if exterior drainage wasn't corrected during the conversion.
Condensation gets less attention in the desert, but interior moisture plus temperature swings can still show up around new openings. If you're trying to separate actual water intrusion from interior moisture issues, this guide on how to prevent window condensation gives a useful maintenance perspective.
What doesn't work
A few shortcuts almost always come back to haunt the homeowner:
- Face-caulking over gaps instead of rebuilding flashing layers
- Skipping sill protection because the area “looks covered”
- Relying on trim boards to block water
- Installing the door before the WRB tie-in is ready
The repair for failed weatherproofing is almost never small. Once water gets into framing, drywall, or flooring transitions, the door unit is only one part of the bill.
Installing and Securing the New Door
Once the opening is framed and weatherproofed, installation becomes a precision job. This isn't where force solves problems. A pre-hung exterior door should settle into the opening with measured adjustments, not wrestling.
Use a pre-hung unit unless you have a specific reason not to
For this type of conversion, a pre-hung door is usually the smart choice. The slab, frame, hinges, and weatherstripping come as one system. That gives you a better chance of getting smooth operation and a full perimeter seal.
A slab-only install can work, but it makes more sense when the existing frame is staying. In a window-to-door conversion, you're creating a new opening, so keeping everything in one matched unit reduces variables.
Set the sill and hinge side first
Dry-fit the unit, then remove it if you need final corrections. Once you're ready, bed the threshold according to the door manufacturer's instructions and place the unit into the opening.
The best sequence is usually:
- Check the sill for level
- Shim the hinge side first
- Verify the jamb is plumb
- Fasten lightly so you can still adjust
- Check the head reveal
- Shim the latch side
- Test swing, latch, and weatherstrip contact before final fastening
If the hinge side is off, the rest of the install chases that error. You end up tweaking the latch side to compensate, and the door still won't feel right.
Shim for support, not for pressure
Shims are there to create even bearing points. They are not wedges you pound until the frame bends into place.
Use shims behind hinge locations, near strike points, and wherever the manufacturer calls for support. Then check operation repeatedly. The door should swing without dragging, the reveal should stay consistent, and the latch should meet the strike without lifting or pulling the slab sideways.
Shop-floor advice: If the lock only works when you push or pull the slab, stop fastening and recheck the frame. The door is telling you the opening or shims are out.
Fasten in a sequence that keeps the frame true
Drive fasteners in stages. Set a few anchors, recheck operation, then continue. Don't fully lock one side down and hope the other side will come into line later.
Watch for these signs of frame distortion:
- The top margin gets tight on one corner
- The latch rubs or needs force
- Weatherstripping is compressed hard in one spot and loose in another
- The active panel on French doors won't align cleanly
On stucco exteriors and slab homes common in Phoenix, threshold support and exterior transition details deserve extra attention. A beautiful door that moves underfoot or leaves a dust gap at the sill is a failed install, even if the trim looks sharp.
Finishing Touches and Long-Term Maintenance
The install doesn't end when the door opens and closes. The finishing phase is where you lock in comfort, appearance, and durability. It's also where Phoenix homeowners need to start thinking differently than most national guides suggest.
Finish the perimeter without creating new problems
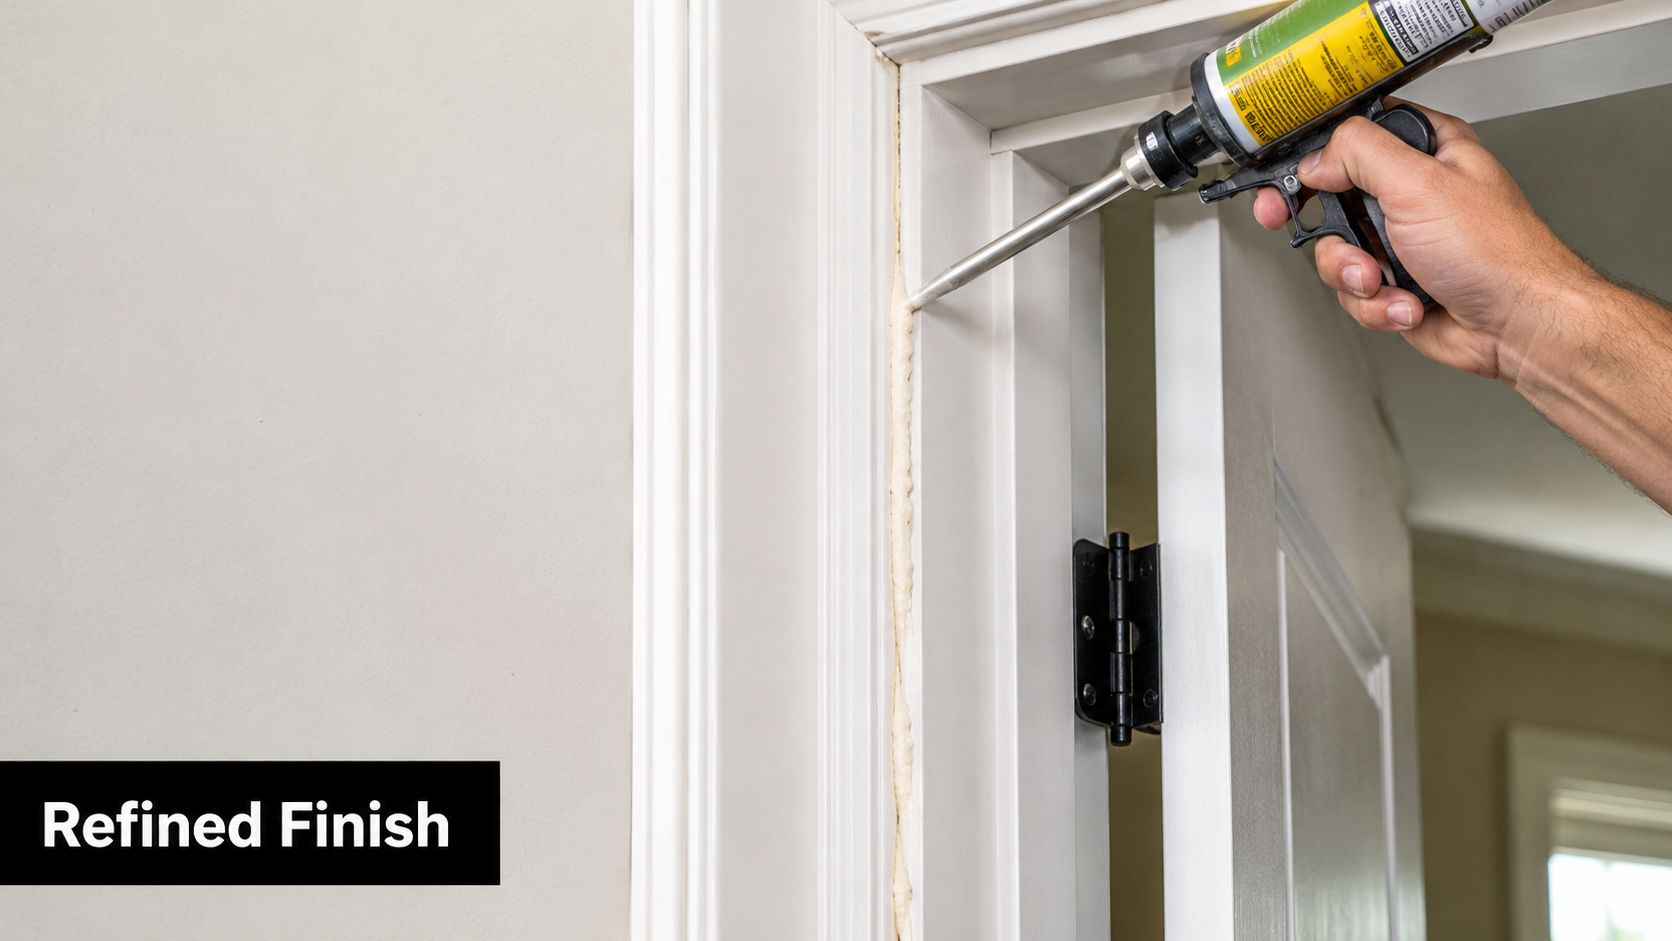
After the frame is secured, insulate the gap between the jamb and framing with low-expansion foam made for windows and doors. Don't overfill. Standard high-pressure foam can bow the jamb and undo all the alignment work you just completed.
Then install interior casing, exterior trim details if applicable, and final sealant joints where the assembly calls for them. Keep those joints neat and intentional. More caulk doesn't mean better waterproofing.
If you're repainting adjacent interior trim or blending the new opening into older finishes, a practical reference like this repainting interior doors guide can help with prep and finish consistency.
The maintenance shift most homeowners miss
This is the part people overlook after replacing a window with a door. You've added a more active opening to the wall. It gets touched more, opened more, exposed more, and stressed more by heat cycling.
In arid climates like Phoenix, 68% of new exterior door installations experience accelerated sealant failure within 2 years due to thermal cycling. That leads to dirt-trapping gaps and a need for quarterly cleaning rather than the annual schedule many homeowners assume.
That matters for several reasons:
- Dust packs into corners and tracks
- Screens collect debris faster
- Sealant gaps hold grime and can hide early failure
- Thresholds wear faster because grit acts like sandpaper
Build a real maintenance routine
A new door opening should go on your recurring exterior checklist.
| Area | What to watch for |
|---|---|
| Frame corners | Cracked or shrinking sealant |
| Threshold | Dirt buildup, loose fasteners, water staining |
| Screen or glass area | Dust film, torn mesh, poor sliding action |
| Exterior trim joint | Small openings before they widen |
Check the door right after a dust storm and right after a hard rain. Those two events expose different failure points.
For Phoenix homeowners with nearby solar arrays, this project can also change airflow, dust patterns, and how often surrounding exterior surfaces need cleaning. The wall has changed. The maintenance pattern changes with it.
Project Costs Timeline and Your Local Checklist
Most homeowners want a straight answer on cost. The honest answer is that the door itself is only part of the budget. Framing changes, finish repairs, stucco work, threshold corrections, and permit requirements often decide whether the project stays manageable or turns expensive.
ConsumerAffairs reports that a standard steel entry door replacement was estimated at about $1,881, while a full vinyl window replacement for a typical home could reach $17,641, which helps explain why this type of conversion can be a strategic upgrade rather than a full exterior overhaul according to their windows and doors market overview.
That doesn't mean your project will be cheap. It means the scope is usually more focused than replacing every window in the house.
Estimated Project Cost and Timeline
| Expense/Task | DIY Cost Range | Pro Cost Range | DIY Timeline |
|---|---|---|---|
| Door unit | Varies by style and material | Varies by style and material | Ordering time varies |
| Permit and inspection | Varies by city | Often included or separate | Depends on approval timing |
| Demolition and framing | Material cost only if DIY | Labor plus materials | Usually multiple work sessions |
| Stucco, drywall, trim, paint | Material cost only if DIY | Labor plus materials | Often spread over several days |
| Final cleaning and maintenance setup | Supplies or service cost | Service cost if outsourced | Ongoing |
For a local budgeting reality check, it also helps to compare this project with broader fenestration pricing. This breakdown of the average cost of window replacement gives useful context when you're deciding whether to convert one opening or plan a larger exterior update.
Phoenix-area checklist before you commit
Use this as your final decision tool:
- Check HOA rules: Some communities care about exterior symmetry, door style, color, and glass type.
- Verify permit requirements with your city: Phoenix, Scottsdale, Peoria, and neighboring jurisdictions may differ on what requires plan review.
- Confirm wall type: Wood frame, block, and stucco assemblies all change labor and detailing.
- Plan the exterior landing: Door thresholds need safe, sensible transitions outside.
- Price the finish work: Drywall and stucco patching often surprise people more than the door itself.
- Decide who owns structural responsibility: If no one is clearly responsible for framing design, stop and fix that first.
- Schedule post-install upkeep: Don't wait for visible dirt or sealant gaps.
If you want a simple rule, use this one. Hire help when the project changes load-bearing framing, slab transitions, stucco detailing, or exterior drainage. Those are the parts that punish shortcuts in Arizona homes.
A new door can improve access, value, and day-to-day comfort, but it also creates a new maintenance zone that needs attention in the Phoenix climate. If your conversion is complete and you want help keeping the glass, screens, frames, and nearby solar panels clean, Sparkle Tech Window Washing LLC serves Scottsdale, Peoria, and the greater Phoenix area with professional window cleaning, screen care, and solar panel cleaning that helps protect the investment you just made.